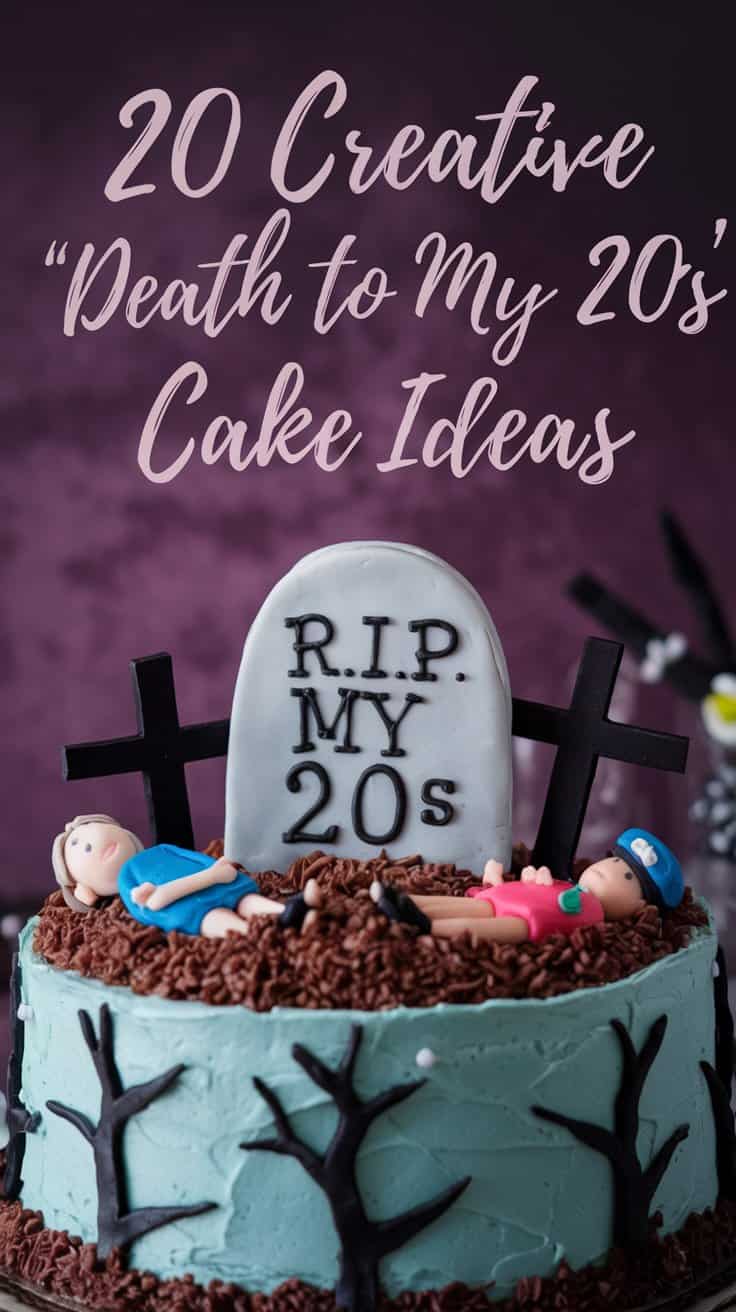
If you’re looking to say goodbye to your twenties in a fun and quirky way, then these 20 “Death to My 20s” cake ideas featuring graveyards, tombstones, and other playful themes are just what you need. From humorous designs to creative decorations, these cakes will help you celebrate this milestone while keeping the mood light and entertaining. Let’s dive right into some unique inspirations for your farewell cake!
Graveyard Cake
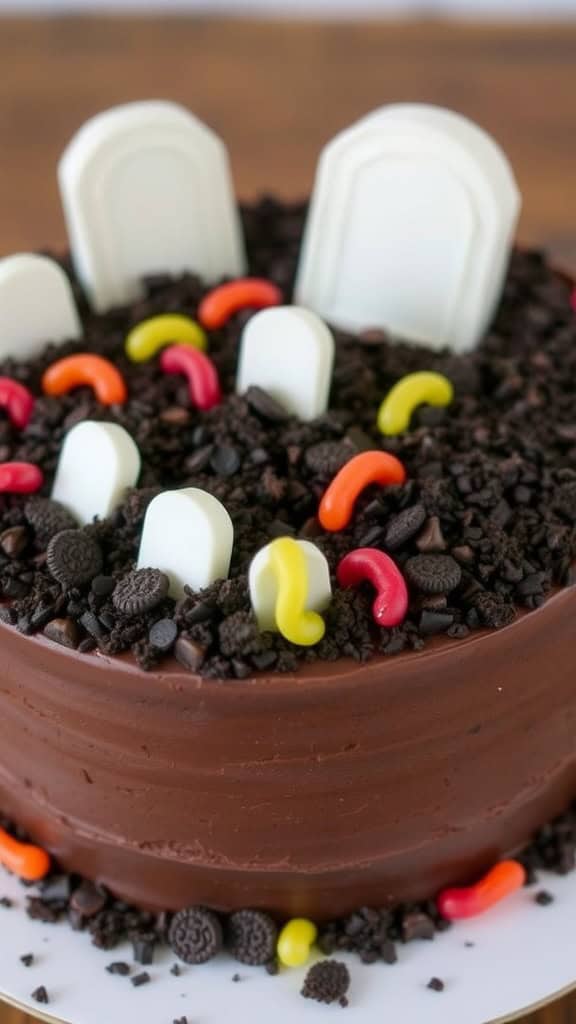
Graveyard cake is a fun and spooky dessert that’s perfect for any Halloween celebration or a ‘Death to My 20s’ theme party. This cake combines layers of rich chocolate with creamy frosting, all topped off with eerie decorations that mimic a graveyard scene. It’s rich in flavor, combining the goodness of chocolate with a touch of creativity, making it an impressive centerpiece for any gathering.
This recipe is relatively simple to follow, making it a great choice for bakers of all skill levels. With a few easy steps, you can whip up this delicious treat that is sure to impress your friends while adding a playful vibe to your celebration.
Ingredients
- 2 cups all-purpose flour
- 1 3/4 cups granulated sugar
- 3/4 cup unsweetened cocoa powder
- 1 1/2 teaspoons baking powder
- 1 1/2 teaspoons baking soda
- 1 teaspoon salt
- 2 large eggs
- 1 cup whole milk
- 1/2 cup vegetable oil
- 2 teaspoons vanilla extract
- 1 cup boiling water
- 1 cup chocolate frosting
- Chocolate cookies and toppings for decoration
Instructions
- Preheat the Oven: Preheat your oven to 350°F (175°C) and grease two 9-inch round cake pans.
- Mix Dry Ingredients: In a large bowl, combine flour, sugar, cocoa powder, baking powder, baking soda, and salt. Mix well.
- Add Wet Ingredients: Add eggs, milk, oil, and vanilla to the dry ingredients. Beat on medium speed for about 2 minutes. Stir in the boiling water until smooth; the batter will be thin.
- Bake the Cakes: Pour the batter evenly into the prepared pans and bake for 30-35 minutes or until a toothpick inserted in the center comes out clean. Let the cakes cool in the pans for 10 minutes before transferring them to wire racks to cool completely.
- Assemble the Cake: Once cooled, place one cake layer on a serving plate. Spread a layer of chocolate frosting on top, then place the second cake layer on top. Frost the entire cake with the remaining chocolate frosting.
- Decorate: Use chocolate cookies and other toppings to create a graveyard scene on top of the cake. Get creative with your decorations!
Tombstone Cake
If you’re looking to celebrate the end of your 20s with a cake that perfectly captures the theme, a Tombstone Cake is just the ticket. This cake combines rich flavors with a fun and spooky design that will be a hit at any birthday bash. It’s surprisingly simple to make, allowing you to focus more on the festivities and less on the prep.
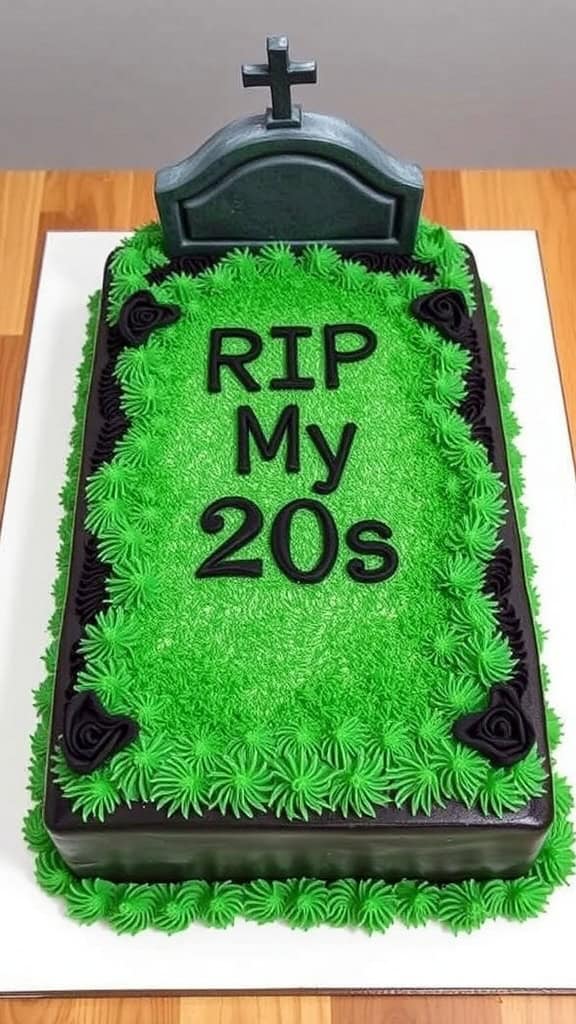
The cake layers are typically chocolate or vanilla, layered with creamy frosting and adorned with fondant tombstones. It’s a playful nod to aging while still being delicious enough to enjoy. So, grab your baking supplies and let’s dive into this fun recipe!
Ingredients
- 2 cups all-purpose flour
- 2 cups granulated sugar
- 3/4 cup unsweetened cocoa powder
- 1 1/2 teaspoons baking powder
- 1 1/2 teaspoons baking soda
- 1 teaspoon salt
- 2 large eggs
- 1 cup whole milk
- 1/2 cup vegetable oil
- 2 teaspoons vanilla extract
- 1 cup boiling water
- 4 cups buttercream frosting
- Fondant for decoration
- Food coloring (optional)
Instructions
- Preheat your oven to 350°F (175°C) and grease and flour two 9-inch round cake pans.
- In a large bowl, mix the flour, sugar, cocoa powder, baking powder, baking soda, and salt until well combined.
- Add the eggs, milk, oil, and vanilla. Mix on medium speed for about 2 minutes until smooth. Carefully stir in the boiling water until combined.
- Pour the batter evenly into the prepared cake pans and bake for 30-35 minutes or until a toothpick inserted in the center comes out clean.
- Let the cakes cool in the pans for 10 minutes before transferring them to a wire rack to cool completely.
- Once cooled, layer the cakes with buttercream frosting between them and cover the entire cake with frosting.
- To create the tombstones, roll out fondant and cut it into tombstone shapes. You can use food coloring to add details like names or dates.
- Place the fondant tombstones on top of the frosted cake and enjoy your spooky celebration!
Zombie Hand Cake
The Zombie Hand Cake is a spooky and playful dessert that’s perfect for birthday celebrations or Halloween gatherings. With a moist chocolate or vanilla cake base, this cake is not only visually striking but also deliciously satisfying. The combination of rich frosting and decorative elements will delight both kids and adults alike.
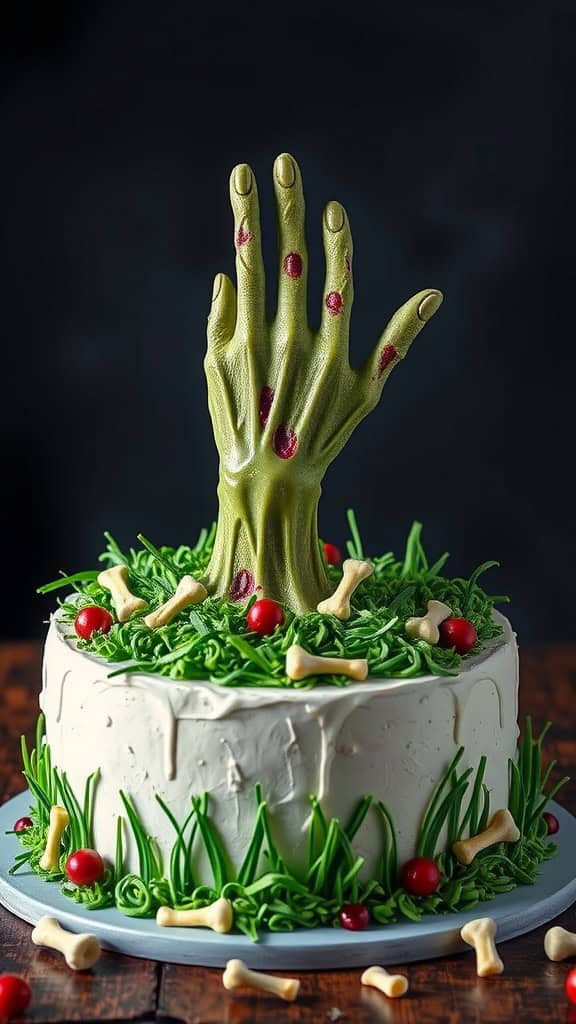
This cake is relatively easy to make, allowing you to unleash your creativity. Whether you’re a novice baker or an experienced one, assembling this cake can be a fun activity. Just imagine a chilling zombie hand reaching out from a bed of grass and bones, setting the perfect eerie vibe for your event!
Ingredients
- 2 cups all-purpose flour
- 1 ½ cups granulated sugar
- 1 cup unsweetened cocoa powder
- 1 ½ teaspoons baking powder
- 1 ½ teaspoons baking soda
- 1 teaspoon salt
- 2 large eggs
- 1 cup whole milk
- ½ cup vegetable oil
- 2 teaspoons vanilla extract
- 1 cup boiling water
- 3 cups vanilla buttercream frosting
- Green food coloring
- Chocolate decorations (bones, berries, etc.)
Instructions
- Preheat your oven to 350°F (175°C). Grease and flour two 9-inch round cake pans.
- In a large bowl, mix together flour, sugar, cocoa powder, baking powder, baking soda, and salt. Add eggs, milk, oil, and vanilla, and mix until smooth. Slowly stir in boiling water until well combined.
- Divide the batter evenly between the prepared pans and bake for 30-35 minutes or until a toothpick inserted in the center comes out clean. Allow cakes to cool for 10 minutes before transferring to wire racks to cool completely.
- Once the cakes are cool, level the tops if necessary. Place one layer on a serving plate and spread a layer of buttercream frosting on top. Add the second layer and frost the entire cake with the remaining buttercream.
- Color a portion of the frosting green with the food coloring. Use this green frosting to create a grassy effect on top of the cake, and add chocolate decorations like bones and berries for extra flair. Finally, carefully place a decorative zombie hand reaching out from the cake to complete the look.
Coffin Cake
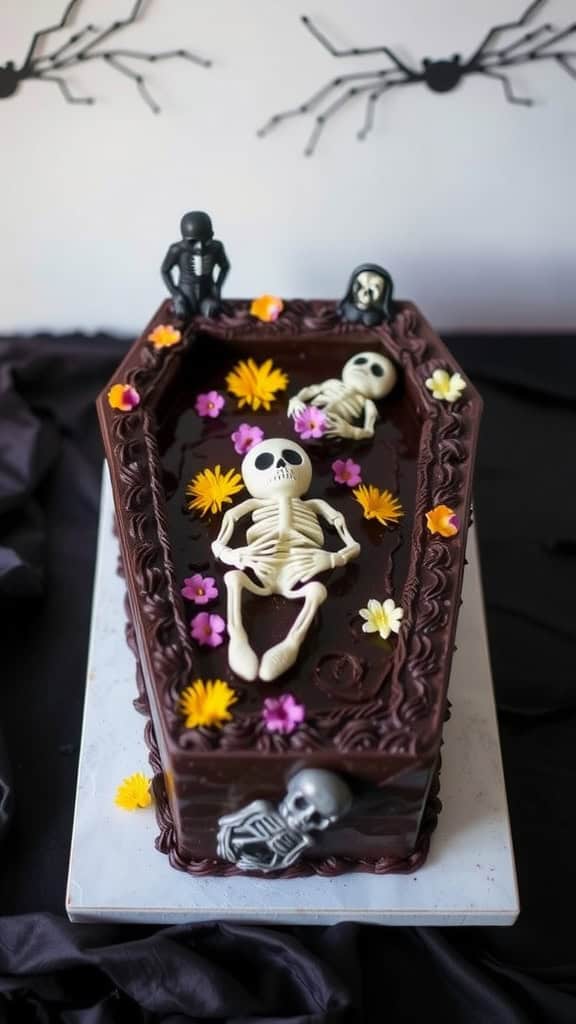
This coffin cake is a fun and slightly spooky dessert perfect for any Halloween-themed celebration. With rich chocolate flavors and a playful presentation, it’s a delightful way to celebrate the end of your 20s! The combination of moist cake and creamy frosting makes for a treat that’s both delicious and eye-catching.
Making this cake is surprisingly simple, even if it looks elaborate. You can easily customize it with your favorite cake flavor and decorations. It’s a great project for a weekend baking session or a fun activity with friends.
Ingredients
- 2 cups all-purpose flour
- 1 ¾ cups granulated sugar
- ¾ cup unsweetened cocoa powder
- 1 ½ teaspoons baking soda
- 1 teaspoon baking powder
- 1 teaspoon salt
- 2 large eggs
- 1 cup whole milk
- ½ cup vegetable oil
- 2 teaspoons vanilla extract
- 1 cup boiling water
- 1 cup chocolate frosting
- Decorative skulls and flowers for garnish
Instructions
- Preheat the oven to 350°F (175°C). Grease and flour a coffin-shaped cake pan.
- In a large bowl, mix the flour, sugar, cocoa powder, baking soda, baking powder, and salt together until well combined.
- Add the eggs, milk, vegetable oil, and vanilla extract. Beat on medium speed for 2 minutes until smooth.
- Stir in the boiling water until fully combined; the batter will be thin.
- Pour the batter into the prepared cake pan and bake for 30-35 minutes, or until a toothpick inserted in the center comes out clean.
- Let the cake cool in the pan for 10 minutes, then remove from the pan and cool completely on a wire rack.
- Once cool, frost the cake with chocolate frosting. Decorate with skulls and edible flowers for that spooky touch.
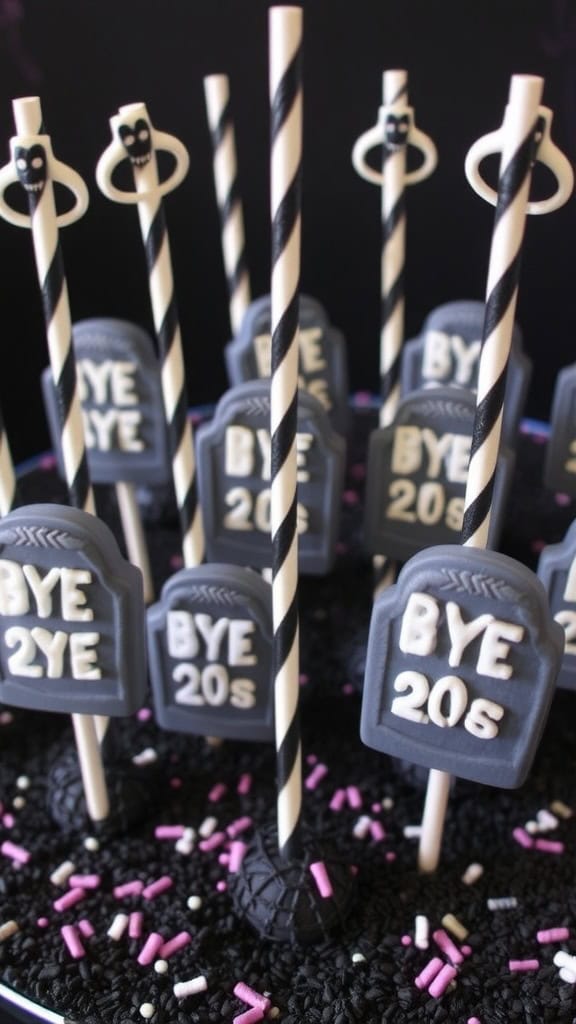
Gravestone Cupcakes

Gravestone cupcakes are a fun and quirky way to celebrate a milestone, especially for those saying goodbye to their 20s. These little treats combine a moist cupcake base with playful and spooky decorations that will delight your guests. The taste is a delightful balance of sweet cake topped with rich frosting, making them the perfect dessert for a themed party.
Making these cupcakes is surprisingly simple! With just a few steps and ingredients, you can create a batch that is sure to impress. They are not only visually appealing but also delicious, making them a hit at any gathering.
Ingredients
- 1 box vanilla cake mix
- 3 large eggs
- 1/2 cup vegetable oil
- 1 cup water
- 1 tub blue frosting
- 1 package of gray fondant
- Black food color gel
- 1/4 cup powdered sugar (for dusting)
Instructions
- Preheat the oven to 350°F (175°C) and line a cupcake pan with paper liners.
- In a large bowl, combine the cake mix, eggs, oil, and water. Mix until smooth and pour the batter into the prepared cupcake liners.
- Bake for about 18-20 minutes or until a toothpick inserted into the center comes out clean. Allow to cool completely.
- While the cupcakes cool, roll out the gray fondant and cut into gravestone shapes. Use black food color gel to write funny epitaphs like “Rest in Party.”
- Once the cupcakes are cool, frost them generously with blue frosting. Carefully place a fondant gravestone on top of each cupcake.
- Finally, dust the cupcakes lightly with powdered sugar to give them a whimsical finish.
Skeleton Cake
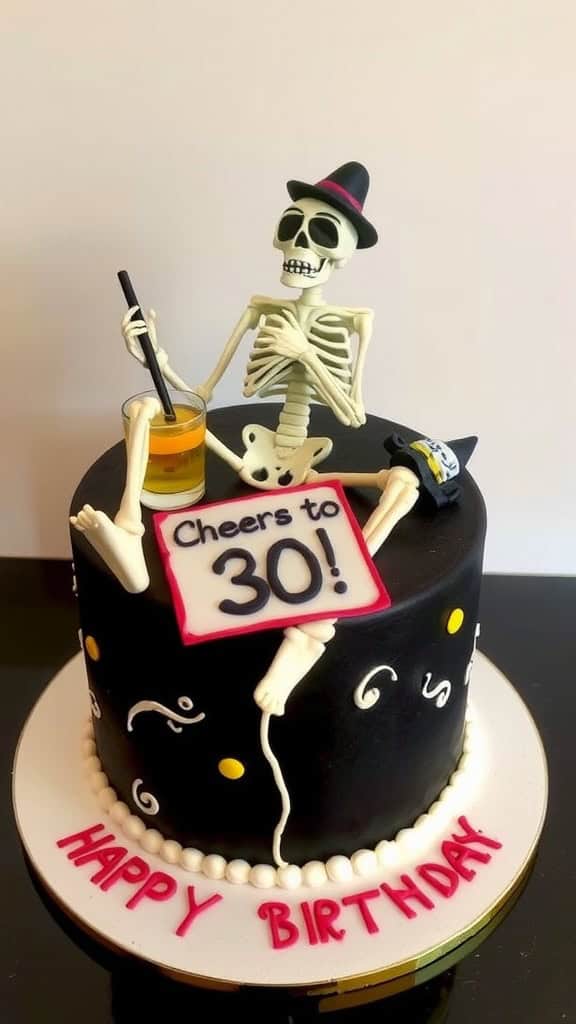
Looking for a fun way to celebrate a milestone birthday? A Skeleton Cake is a playful and unique dessert that adds a touch of humor to your celebration. This cake combines rich chocolate flavor with a whimsical design, perfect for those embracing their 30s with a laugh. It’s surprisingly simple to make, allowing you to focus on having a good time with friends and family.
The cake’s layers are usually filled with creamy frosting, giving it a delightful taste that everyone will love. The skeleton decoration can be made using fondant or chocolate, making it a perfect centerpiece for your party. Get ready to impress your guests with this cheeky, yet delicious cake!
Ingredients
- 2 cups all-purpose flour
- 2 cups granulated sugar
- 3/4 cup unsweetened cocoa powder
- 1 1/2 teaspoons baking powder
- 1 1/2 teaspoons baking soda
- 1 teaspoon salt
- 2 large eggs
- 1 cup whole milk
- 1/2 cup vegetable oil
- 2 teaspoons pure vanilla extract
- 1 cup boiling water
- 4 cups buttercream frosting
- Black fondant or chocolate for decoration
- Skeleton figurine for topping
Instructions
- Preheat your oven to 350°F (175°C). Grease and flour two 9-inch round cake pans.
- In a large bowl, mix together flour, sugar, cocoa powder, baking powder, baking soda, and salt.
- Add eggs, milk, oil, and vanilla to the dry ingredients, mixing until well combined. Gradually stir in boiling water until smooth.
- Pour the batter evenly into the prepared cake pans and bake for 30-35 minutes, or until a toothpick comes out clean.
- Let the cakes cool in the pans for 10 minutes, then remove them from the pans and cool completely on a wire rack.
- Once cooled, frost the top of one cake layer with buttercream, place the other layer on top, and frost the entire cake.
- Cover the cake with black fondant or decorate with chocolate to create a spooky look. Top with a skeleton figurine and any additional decorations to complete the theme.
Death By Chocolate Cake
Death By Chocolate Cake is the ultimate indulgence for any chocolate lover. This rich, moist cake is layered with creamy chocolate frosting and drizzled with chocolate ganache, making each bite a sweet escape. It’s perfect for special occasions, especially if you’re looking to celebrate the end of your 20s with a dramatic flair.
Not only does this cake satisfy your chocolate cravings, but it’s surprisingly simple to make! With basic ingredients and straightforward instructions, you’ll impress your friends and family without spending hours in the kitchen. So, grab your mixing bowl and get ready to whip up a decadent dessert that’s sure to leave a lasting impression!
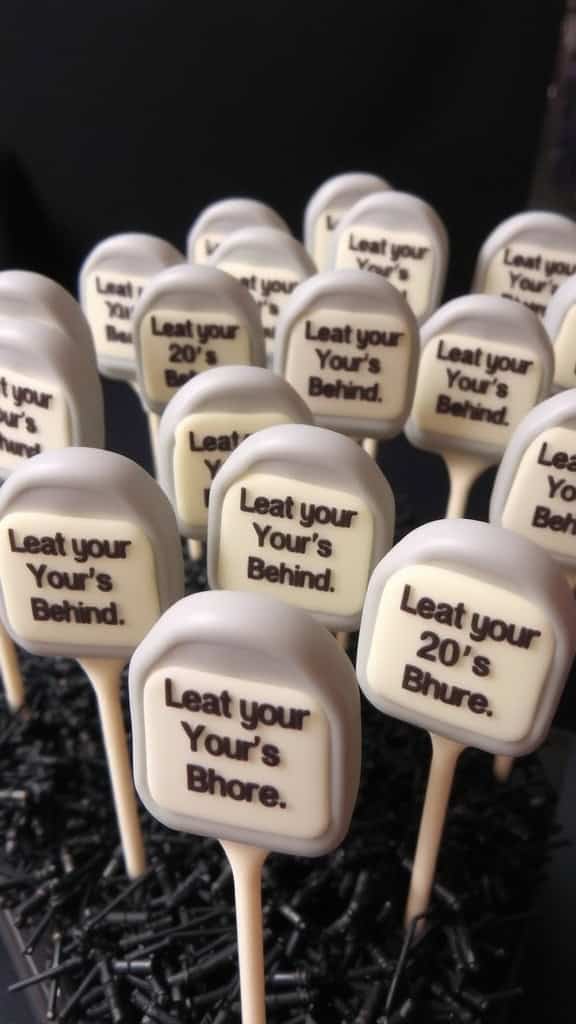
Epitaph Cake Pops
Epitaph cake pops are a fun and quirky treat that perfectly capture the spirit of saying goodbye to your 20s. These delectable bites combine moist cake with rich frosting, all coated in a smooth layer of chocolate. They’re not just tasty; they also bring a playful touch to any celebration, making them a hit at birthday parties, especially for those entering a new decade.
The best part? They’re relatively simple to make! With just a few ingredients and some creativity, you can transform regular cake into adorable pops that look like tombstones. The flavors are customizable, allowing you to choose your favorite cake and frosting combinations. Let’s dive into the recipe!
Graveyard Scene Cake
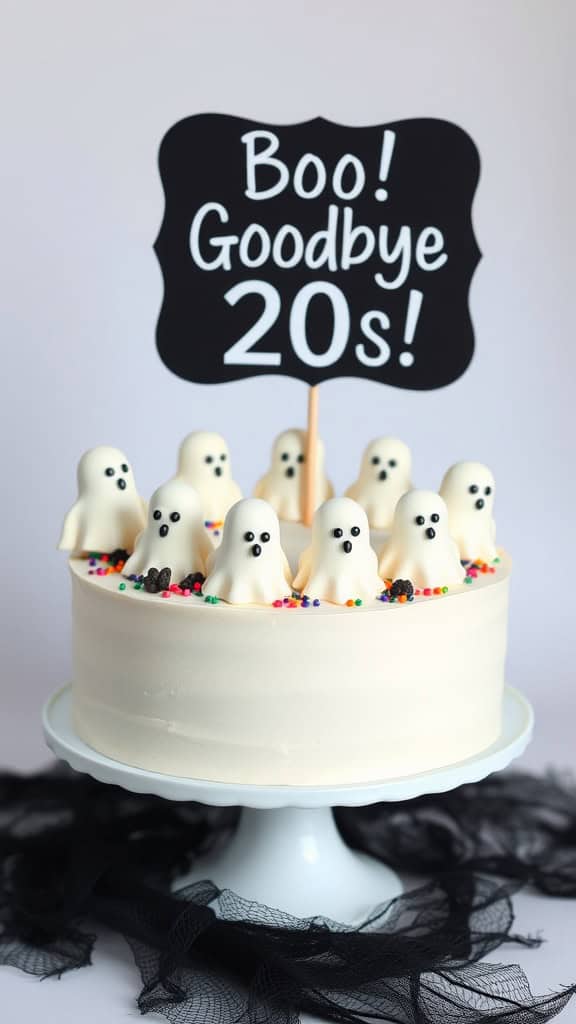
Celebrate a milestone birthday with a Graveyard Scene Cake that’s both spooky and delightful. This cake combines rich chocolate or vanilla layers with a creamy frosting, making it a treat that everyone will enjoy. Perfect for Halloween or a themed birthday party, it’s surprisingly simple to create, even for beginners.
This cake features layers adorned with a mix of fun decorations like ghostly figures, tombstones, and eerie trees, bringing a festive Halloween vibe to your celebration. Let your creativity shine as you personalize the decorations for a truly unique cake experience!
Ingredients
- 2 cups all-purpose flour
- 1 1/2 cups granulated sugar
- 3/4 cup unsweetened cocoa powder
- 1 1/2 teaspoons baking powder
- 1 1/2 teaspoons baking soda
- 1 teaspoon salt
- 2 large eggs
- 1 cup whole milk
- 1/2 cup vegetable oil
- 2 teaspoons vanilla extract
- 1 cup boiling water
- 4 cups buttercream frosting
- White fondant for ghosts
- Black and orange fondant for tombstones and decorations
- Chocolate sticks for tree branches
Instructions
- Preheat your oven to 350°F (175°C) and grease and flour your cake pans.
- In a large bowl, combine the flour, sugar, cocoa powder, baking powder, baking soda, and salt. Mix well.
- Add the eggs, milk, oil, and vanilla to the dry ingredients. Beat on medium speed for 2 minutes. Stir in boiling water until well combined.
- Pour the batter evenly into the prepared pans. Bake for 30-35 minutes or until a toothpick comes out clean.
- Once cooled, level the cake layers if necessary, and spread buttercream frosting between the layers and around the sides of the cake.
- Use the fondant to create ghost shapes and tombstones, and the chocolate sticks to form tree branches. Decorate as desired to create your graveyard scene.
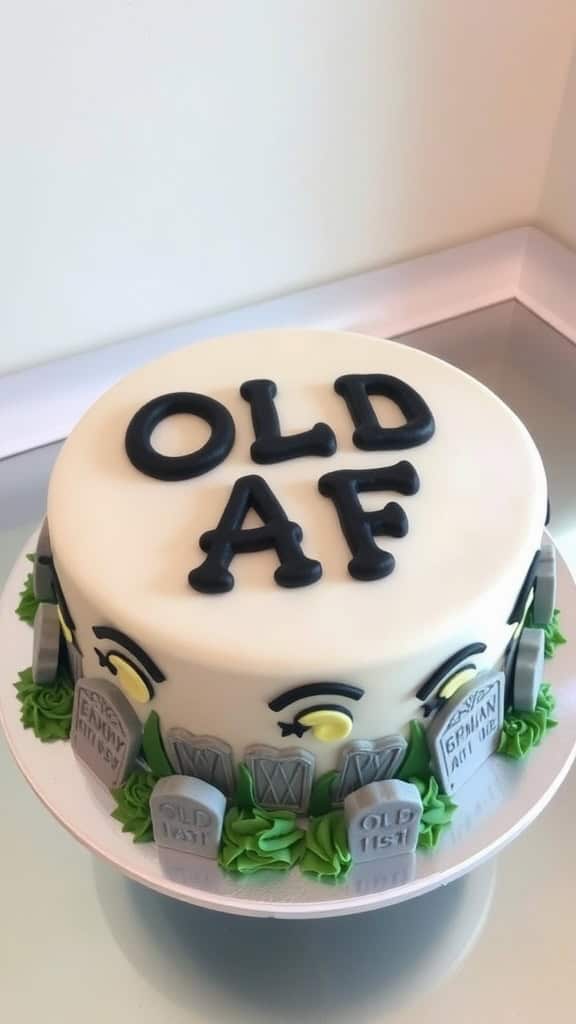
“Old Af” Cake
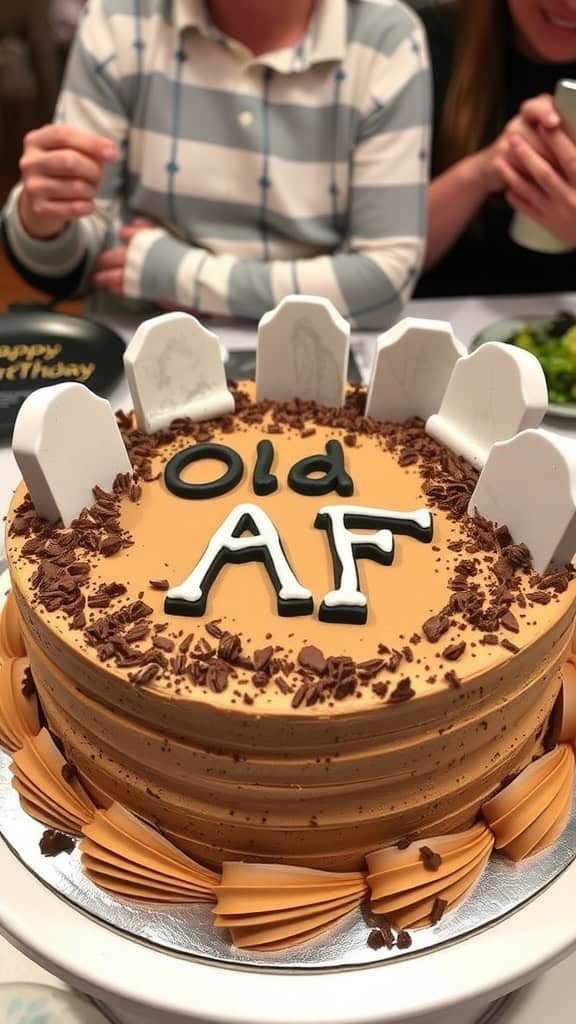
Celebrating milestones like turning 30 can be both exciting and a bit daunting. The Old Af Cake strikes a perfect balance between humor and deliciousness, making it an ideal centerpiece for any birthday bash. With its rich chocolate flavor and creamy frosting, this cake is sure to delight your taste buds while providing a cheeky nod to reaching a new decade.
This recipe is straightforward, making it fun for bakers of all skill levels. Layer it with a scrumptious chocolate ganache or a simple buttercream, and you’ll have a dessert that not only pleases the crowd but also brings a smile to their faces.
Ingredients
- 2 cups all-purpose flour
- 2 cups granulated sugar
- 1 3/4 teaspoons baking powder
- 1 1/2 teaspoons baking soda
- 1 teaspoon salt
- 3/4 cup cocoa powder
- 2 large eggs
- 1 cup whole milk
- 1/2 cup vegetable oil
- 2 teaspoons vanilla extract
- 1 cup boiling water
- 2 cups chocolate ganache or buttercream for frosting
Instructions
- Preheat the oven to 350°F (175°C). Grease and flour two 9-inch round cake pans.
- In a large mixing bowl, combine flour, sugar, baking powder, baking soda, salt, and cocoa powder. Mix until well combined.
- Add eggs, milk, vegetable oil, and vanilla to the dry ingredients. Beat on medium speed for about 2 minutes until smooth.
- Stir in boiling water until well blended. The batter will be thin, but that’s okay!
- Pour the batter evenly into the prepared pans. Bake for 30 to 35 minutes, or until a toothpick inserted into the center comes out clean.
- Let the cakes cool in the pans for about 10 minutes, then transfer to wire racks to cool completely.
- Once cooled, frost with chocolate ganache or buttercream, and decorate with themed embellishments to match your birthday vibe.
Creepy Clown Cake
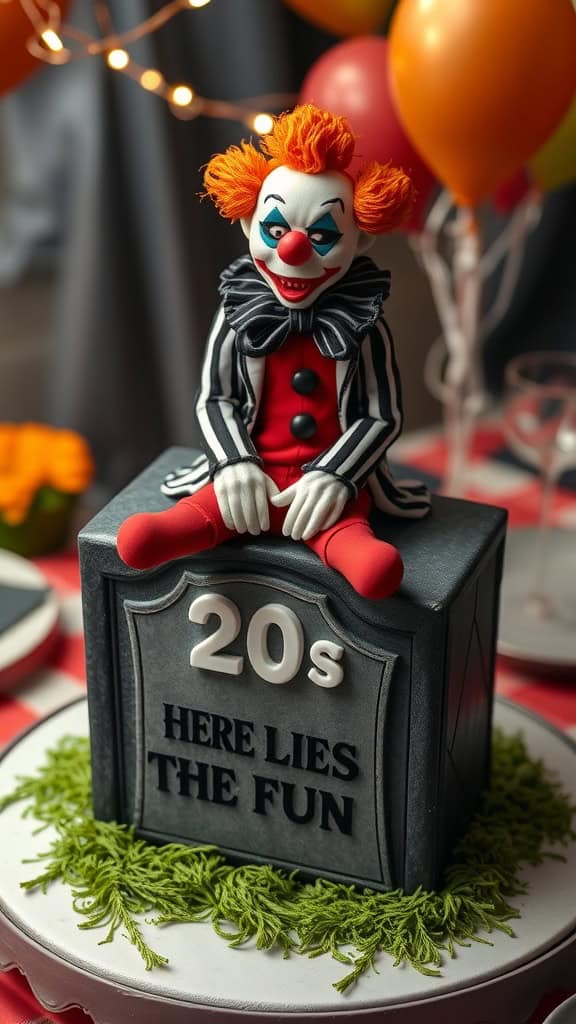
This Creepy Clown Cake is a delightful way to celebrate the end of your twenties with a touch of humor. Combining the flavors of chocolate and vanilla, it’s a sweet treat that looks both fun and slightly spooky. The cake is easy to create, making it perfect for a casual gathering or a themed party.
The clown design is playful yet eerie, capturing the essence of a party while embracing the light-heartedness of turning 30. The cake is layered, with creamy frosting that can be customized in vibrant colors to match your theme. Get ready for a cake that not only tastes delicious but also serves as a fantastic conversation starter!
Ingredients
- 2 cups all-purpose flour
- 1 ½ cups granulated sugar
- ¾ cup unsweetened cocoa powder
- 1 ½ teaspoons baking powder
- 1 ½ teaspoons baking soda
- 1 teaspoon salt
- 2 large eggs
- 1 cup whole milk
- ½ cup vegetable oil
- 2 teaspoons vanilla extract
- 1 cup boiling water
- 3 cups buttercream frosting (divided into colors)
- Fondant for decorations
- Food coloring gel (for clown features)
Instructions
- Preheat the oven to 350°F (175°C). Grease and flour two 9-inch round cake pans.
- In a large mixing bowl, combine flour, sugar, cocoa powder, baking powder, baking soda, and salt. Mix well.
- Add eggs, milk, vegetable oil, and vanilla extract to the dry ingredients. Beat on medium speed for 2 minutes until well combined.
- Stir in boiling water until the batter is smooth (the batter will be thin).
- Pour the batter evenly into the prepared pans. Bake for 30-35 minutes or until a toothpick inserted in the center comes out clean.
- Let the cakes cool in the pans for 10 minutes, then remove from pans to cool completely on wire racks.
- Once cooled, level the cakes if necessary and start stacking them with a layer of buttercream frosting in between.
- Cover the entire cake with a thin layer of frosting to create a crumb coat. Chill for 30 minutes.
- After chilling, apply a thicker layer of frosting and smooth it out. Use fondant to create clown features, such as the face and hair, and use food coloring to add details.
- Finish with any additional decorations, like balloons or creepy elements, to enhance the theme.
Skull Cake
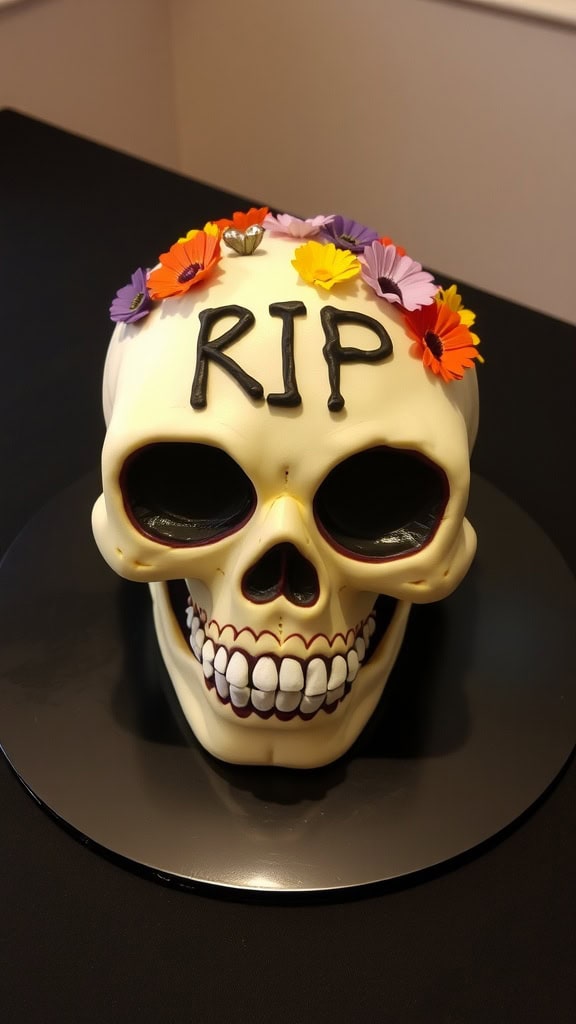
The Skull Cake is a fun and quirky dessert that’s perfect for Halloween or any celebration where you want to add a touch of spookiness. With its creamy frosting and delightful flavors, it’s both a visual treat and a tasty delight. This recipe balances the fun of a skull design with a delicious vanilla or chocolate flavor that everyone will enjoy.
Making a Skull Cake can be simpler than it seems. With a few basic baking techniques and some creative decorating, you can impress your guests with this unique cake. Plus, it’s a great way to get your friends involved in the baking process!
Ingredients
- 2 cups all-purpose flour
- 1 1/2 cups granulated sugar
- 1/2 cup unsweetened cocoa powder (for chocolate cake)
- 1 cup unsalted butter, softened
- 4 large eggs
- 1 cup milk
- 2 1/2 teaspoons baking powder
- 1 teaspoon vanilla extract
- 1/2 teaspoon salt
- White fondant (for decoration)
- Black food coloring (for details)
- Colored flowers or candy bones (for garnish)
Instructions
- Preheat the oven to 350°F (175°C). Grease and flour a skull-shaped cake pan.
- In a large bowl, cream the butter and sugar until light and fluffy. Add eggs one at a time, mixing well after each addition.
- In another bowl, whisk together flour, cocoa powder (if using), baking powder, and salt. Gradually add this mixture to the butter mixture, alternating with milk. Stir in vanilla extract.
- Pour the batter into the prepared cake pan. Bake for 30-35 minutes or until a toothpick inserted in the center comes out clean. Let it cool completely.
- Cover the cooled cake with white fondant to create the skull appearance. Use black food coloring to paint the eyes and mouth. Decorate with flowers or candy bones as desired.
“Goodbye Youth” Cake
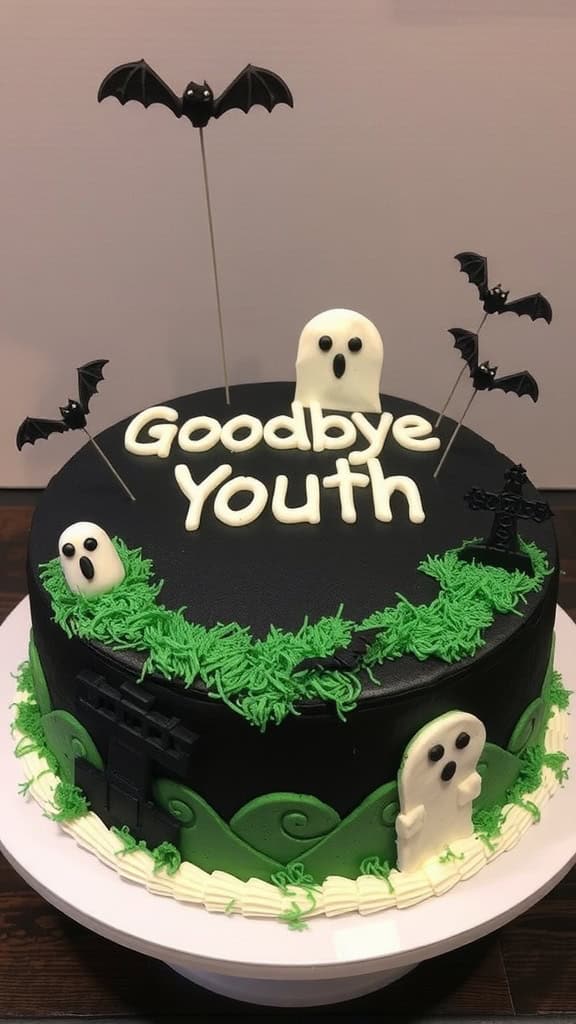
Saying goodbye to your 20s can be bittersweet, but this Goodbye Youth Cake makes it a little sweeter! With layers of rich chocolate cake and creamy frosting, it’s a delicious tribute to the end of an era. This cake is easy to make and perfect for anyone looking to celebrate or commiserate their farewell to youth.
The cake is decorated in a playful and spooky style, perfect for a themed birthday bash. The combination of flavors and the fun decorations will have everyone talking. Gather your friends, slice up this cake, and enjoy the tasty farewell!
Ingredients
- 2 cups all-purpose flour
- 1 3/4 cups granulated sugar
- 3/4 cup unsweetened cocoa powder
- 1 1/2 teaspoons baking powder
- 1 1/2 teaspoons baking soda
- 1 teaspoon salt
- 2 large eggs
- 1 cup whole milk
- 1/2 cup vegetable oil
- 2 teaspoons vanilla extract
- 1 cup boiling water
- 4 cups buttercream frosting
- Decorative elements (like fondant ghosts, tombstones, and edible grass)
Instructions
- Preheat your oven to 350°F (175°C). Grease and flour two 9-inch round cake pans.
- In a large mixing bowl, combine flour, sugar, cocoa powder, baking powder, baking soda, and salt. Mix well.
- Add eggs, milk, oil, and vanilla to the dry ingredients. Beat with a mixer on medium speed for 2 minutes.
- Stir in boiling water (the batter will be thin) and pour into prepared pans.
- Bake for 30-35 minutes or until a toothpick comes out clean. Let the cakes cool in pans for 10 minutes, then remove and cool completely on wire racks.
- Once cooled, spread a layer of buttercream between the two cakes, then apply a crumb coat and refrigerate for 30 minutes. Finish decorating with buttercream and your fun spooky elements.
“Over The Hill” Cake

The “Over The Hill” cake is a delightful way to celebrate a milestone birthday. This cake is often characterized by its playful design, resembling a rolling hill, and is usually flavored with delicious vanilla or chocolate. The sweet taste is complemented by colorful decorations that add a fun twist, making it not only tasty but visually appealing.
Making this cake is fairly simple, even for those who might not have extensive baking experience. With just a few steps, you can craft a show-stopping cake that brings smiles to any birthday party. It’s a joyful way to embrace aging with humor and creativity!
Ingredients
- 2 cups all-purpose flour
- 1 ½ cups granulated sugar
- ¾ cup unsweetened cocoa powder (if making chocolate flavor)
- 1 teaspoon baking powder
- 1 teaspoon baking soda
- ½ teaspoon salt
- 1 cup buttermilk
- ½ cup vegetable oil
- 2 large eggs
- 2 teaspoons vanilla extract
- 1 cup boiling water
- Green fondant (for decoration)
- Assorted candies (for additional decoration)
- Buttercream frosting
Instructions
- Preheat the oven to 350°F (175°C). Grease and flour two round cake pans.
- In a large bowl, combine flour, cocoa powder, sugar, baking powder, baking soda, and salt. Mix well.
- Add buttermilk, vegetable oil, eggs, and vanilla extract. Mix until combined.
- Gradually mix in boiling water until the batter is smooth.
- Pour the batter evenly into the prepared pans and bake for 30-35 minutes, or until a toothpick comes out clean.
- Allow the cakes to cool completely. Once cooled, level the tops if necessary.
- Stack the two cakes with a layer of buttercream in between. Sculpt the top into a dome shape to resemble a hill.
- Cover the entire cake with buttercream frosting, smoothing it out.
- Roll out the green fondant and drape it over the cake, smoothing out any wrinkles.
- Decorate with candies and figurines to complete the look of the cake.
Gothic Rose Cake
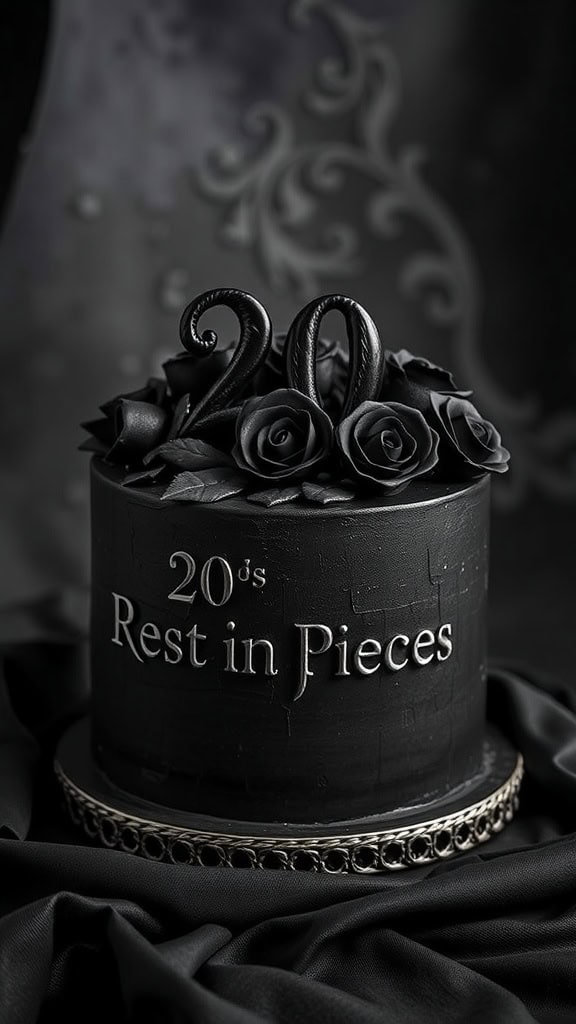
The Gothic Rose Cake is a striking dessert that combines dark elegance with a touch of whimsy. This cake features rich chocolate flavors and is adorned with beautifully crafted black roses, making it ideal for a themed birthday party or any celebration that embraces the darker side of life. While the intricate design may seem daunting, it’s quite simple to create with a little patience and practice.
This cake not only looks impressive but tastes delicious too! The moist layers of chocolate cake paired with a creamy frosting will leave your guests talking long after the last slice is gone. Here’s how to make this unforgettable treat:
Ingredients
- 2 cups all-purpose flour
- 2 cups granulated sugar
- 3/4 cup unsweetened cocoa powder
- 1 1/2 teaspoons baking powder
- 1 1/2 teaspoons baking soda
- 1 teaspoon salt
- 2 large eggs
- 1 cup whole milk
- 1/2 cup vegetable oil
- 2 teaspoons vanilla extract
- 1 cup boiling water
- 2 cups butter, softened
- 4 cups powdered sugar
- 1/2 cup cocoa powder (for frosting)
- 1 teaspoon vanilla extract (for frosting)
- Black food coloring (for roses)
- Silver edible dust (optional, for decoration)
Instructions
- Preheat the oven to 350°F (175°C). Grease and flour two 9-inch round cake pans.
- In a large bowl, mix together flour, sugar, cocoa powder, baking powder, baking soda, and salt. Add eggs, milk, oil, and vanilla, and mix until well combined. Gradually stir in boiling water.
- Pour the batter evenly into the prepared pans. Bake for 30-35 minutes, or until a toothpick comes out clean. Let the cakes cool in the pans for 10 minutes before transferring to wire racks.
- While the cakes cool, prepare the frosting by beating the softened butter until creamy. Gradually add the powdered sugar and cocoa powder, followed by vanilla. Mix until smooth and fluffy.
- Once the cakes are completely cooled, place one layer on a serving plate. Spread a layer of frosting on top, then place the second layer on top and frost the entire cake.
- For the roses, mix fondant with black food coloring and shape into rose petals. Assemble the petals into roses and place them around the top of the cake. Use silver edible dust for an extra touch of glam.
“Rip Fun” Cake
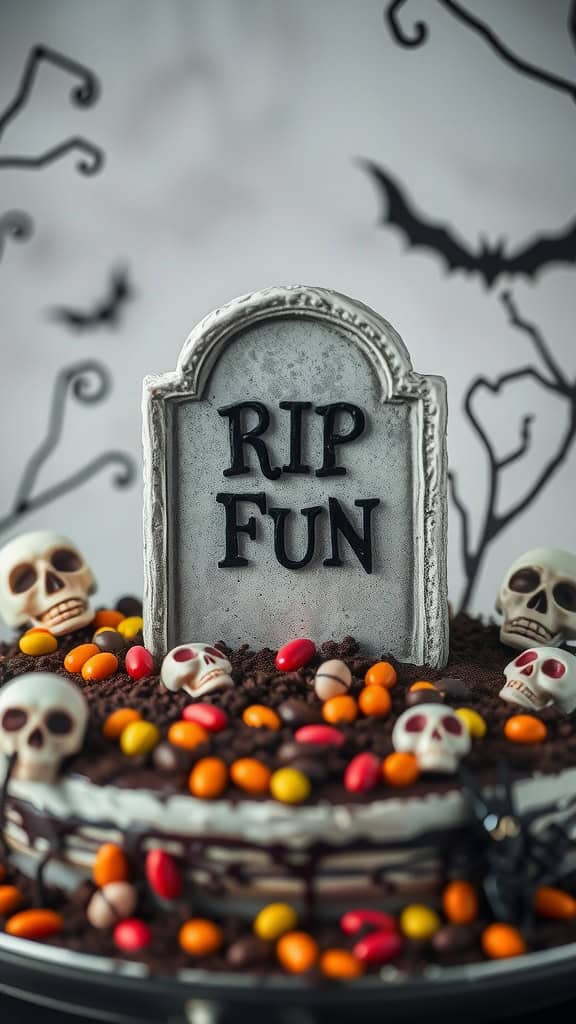
This Rip Fun Cake is a playful way to celebrate the end of your twenties with a spooky twist. Layered with rich chocolate flavors and decorated with ghoulish elements, it’s both delicious and fun to make. Ideal for those who love a good laugh and a sweet treat, this cake is sure to be a hit at any birthday party.
With simple ingredients and easy-to-follow steps, this cake is perfect for bakers of all skill levels. It’s a delightful combination of chocolate cake, creamy frosting, and an assortment of playful toppings that will surely evoke cheers and giggles!
Ingredients
- 2 cups all-purpose flour
- 2 cups granulated sugar
- 3/4 cup unsweetened cocoa powder
- 1 1/2 teaspoons baking powder
- 1 1/2 teaspoons baking soda
- 1 teaspoon salt
- 2 large eggs
- 1 cup whole milk
- 1/2 cup vegetable oil
- 2 teaspoons vanilla extract
- 1 cup boiling water
- 2 cups chocolate frosting
- Colored candies (for decoration)
- Skull and tombstone cake toppers
Instructions
- Preheat your oven to 350°F (175°C). Grease and flour two round cake pans.
- In a large bowl, mix together flour, sugar, cocoa powder, baking powder, baking soda, and salt. Add eggs, milk, oil, and vanilla. Beat on medium speed for 2 minutes. Stir in boiling water (the batter will be thin).
- Pour the batter evenly into the prepared pans. Bake for 30-35 minutes until a toothpick inserted in the center comes out clean. Let cool for 10 minutes, then remove from pans to cool completely on wire racks.
- Once the cakes are cool, spread a layer of chocolate frosting between the two cakes and on the top and sides. Use additional frosting to create a graveyard effect on top.
- Decorate with colorful candies, skulls, and the tombstone topper. Enjoy your spooky celebration!
“Aged To Perfection” Cake
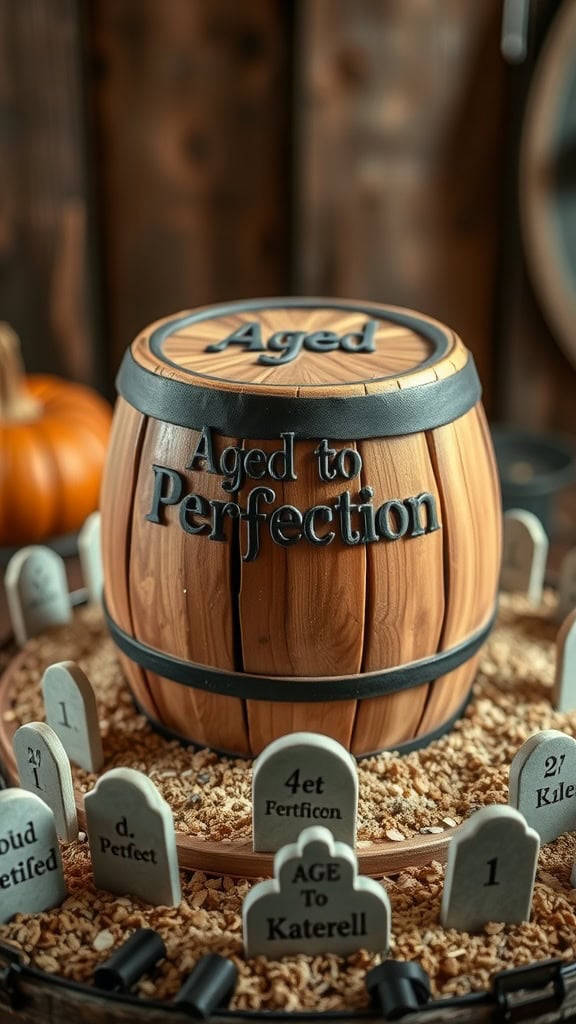
This Aged to Perfection Cake is a playful and delicious way to celebrate a milestone, especially as you transition out of your 20s. With a rich flavor profile, this cake features layers of moist chocolate or whiskey-infused cake paired with creamy buttercream. The whimsical design mimics a whiskey barrel, making it not only tasty but also a fun centerpiece for any gathering.
Making this cake is straightforward, and even novice bakers can achieve impressive results. It’s a perfect opportunity to experiment with flavors and get creative with decoration!
Ingredients
- 2 cups all-purpose flour
- 1 ½ cups granulated sugar
- ¾ cup unsweetened cocoa powder
- 1 ½ teaspoons baking powder
- 1 ½ teaspoons baking soda
- 1 teaspoon salt
- 2 large eggs
- 1 cup whole milk
- ½ cup vegetable oil
- 2 teaspoons vanilla extract
- 1 cup boiling water
- 1 cup butter, softened
- 4 cups powdered sugar
- 1 tablespoon milk (for thinning frosting)
- Food coloring (brown and black for decoration)
Instructions
- Preheat the oven to 350°F (175°C). Grease and flour two 9-inch round cake pans.
- In a large bowl, mix flour, sugar, cocoa powder, baking powder, baking soda, and salt. Add eggs, milk, oil, and vanilla. Beat for 2 minutes on medium speed. Stir in boiling water (batter will be thin).
- Pour the batter evenly into the prepared pans. Bake for 30-35 minutes or until a toothpick comes out clean. Let cool for 10 minutes before transferring to wire racks to cool completely.
- For the frosting, cream the softened butter until light and fluffy. Gradually add powdered sugar, beating well. Add a tablespoon of milk to reach the desired consistency.
- Once the cakes are cool, place one layer on a serving platter. Spread frosting evenly on top. Place the second layer on top and frost the top and sides of the cake. Use food coloring to create the barrel effect and add details like the barrel rings and any tombstone decorations.
Ghostly Cake
Ghostly cakes bring a whimsical touch to any celebration. With their creamy vanilla flavor and fun ghost decorations, they are sure to delight guests of all ages. This cake is not only a feast for the eyes but also a treat for the taste buds, combining smooth frosting with a light and fluffy cake base.
The best part? This recipe is straightforward and perfect for both novice and experienced bakers. You can easily whip it up in a couple of hours, making it an ideal dessert for a spooky party or a cheerful farewell to your 20s.
Ingredients
- 2 cups all-purpose flour
- 1 ½ cups granulated sugar
- ½ cup unsalted butter, softened
- 1 cup milk
- 3 ½ teaspoons baking powder
- 1 teaspoon vanilla extract
- ½ teaspoon salt
- 4 large eggs
- 3 cups vanilla frosting
- Ghost-shaped candies or fondant for decoration
- Colored sprinkles for a festive touch
Instructions
- Preheat the oven to 350°F (175°C). Grease and flour two 9-inch round cake pans.
- In a mixing bowl, cream together softened butter and sugar until light and fluffy. Add eggs one at a time, mixing well after each addition.
- In another bowl, combine flour, baking powder, and salt. Gradually add this dry mixture to the butter mixture, alternating with milk and vanilla. Mix until well combined.
- Divide the batter evenly between the prepared pans and smooth the tops. Bake for 25-30 minutes or until a toothpick inserted in the center comes out clean.
- Once baked, let the cakes cool in the pans for 10 minutes before transferring them to a wire rack to cool completely.
- Once cooled, spread a layer of frosting on top of one cake layer, place the second layer on top, and frost the top and sides of the cake.
- Decorate with ghost-shaped candies and colored sprinkles to bring your ghostly theme to life!
“Final Countdown” Cake
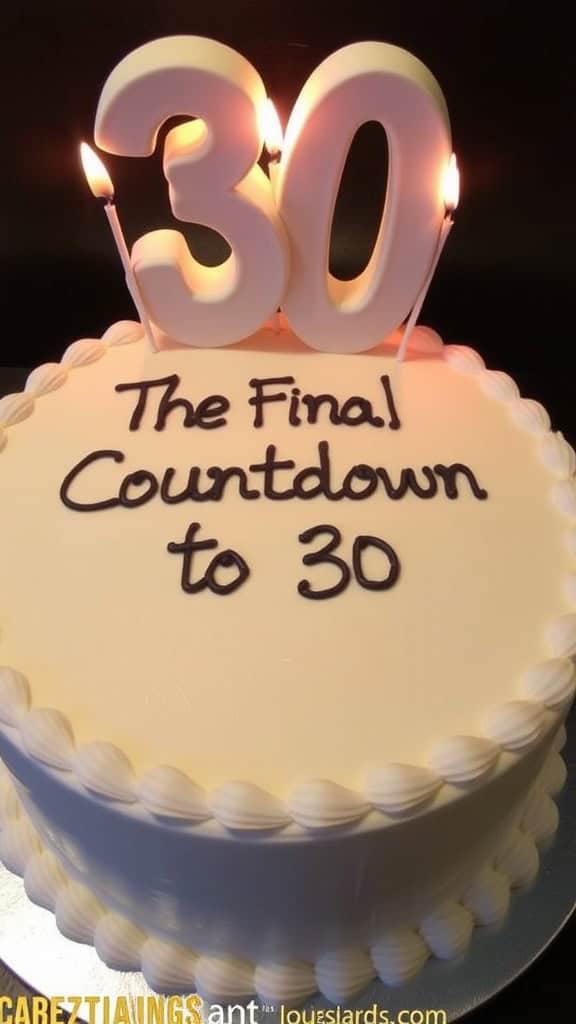
Celebrate the transition into your 30s with a cake that captures the essence of this milestone. The Final Countdown Cake is not just a dessert; it’s a fun and light-hearted way to mark the end of one decade and the start of another. With its simple yet elegant design, this cake is perfect for gatherings with friends or family.
This cake features a moist vanilla base, layered with creamy frosting that adds a delightful sweetness. The decorations, including the iconic number candles, make it a festive centerpiece. Plus, it’s straightforward to make, ensuring you can focus on enjoying your celebration without stress!
Ingredients
- 2 cups all-purpose flour
- 1 ½ cups granulated sugar
- ½ cup unsalted butter, softened
- 1 cup milk
- 3 ½ teaspoons baking powder
- ½ teaspoon salt
- 1 teaspoon vanilla extract
- 4 large eggs
- 3 cups frosting (store-bought or homemade)
- Number candles for decoration
Instructions
- Preheat the oven to 350°F (175°C). Grease and flour two 9-inch round cake pans.
- In a mixing bowl, cream together the softened butter and sugar until light and fluffy. Beat in the eggs, one at a time, mixing well after each addition.
- Add the milk and vanilla extract, mixing until combined. In a separate bowl, sift together the flour, baking powder, and salt. Gradually add the dry ingredients to the wet mixture, stirring until just combined.
- Divide the batter evenly between the prepared cake pans. Bake for 25-30 minutes, or until a toothpick inserted in the center comes out clean.
- Allow the cakes to cool in the pans for 10 minutes, then transfer them to a wire rack to cool completely.
- Once cool, frost the top of one cake layer, place the other layer on top, and frost the top and sides of the cake. Decorate with number candles to highlight the countdown to 30.
“Buried In Cake” Cake
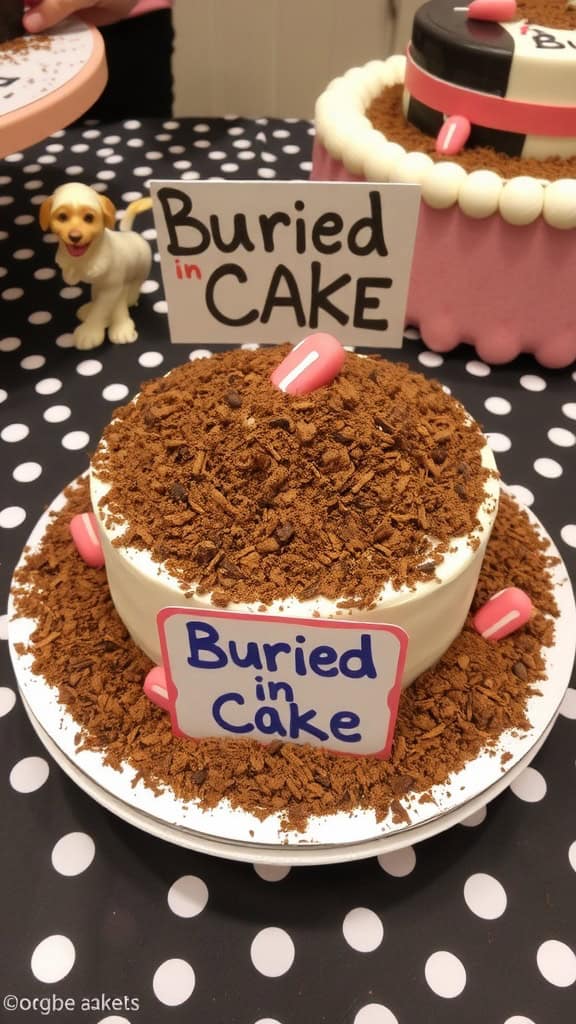
Get ready for a cake experience that’s both fun and indulgent! The ‘Buried In Cake’ cake is a delightful twist on traditional desserts, combining rich chocolate flavors with a playful, graveyard theme. This cake is not just about looks; it’s moist, chocolaty, and has a hint of sweetness that will satisfy any sweet tooth. Plus, it’s simple to create, making it perfect for any celebration, especially those milestone birthdays.
The cake features layers of fluffy chocolate cake, creamy filling, and a crumbly chocolate topping that mimics dirt, all creatively fashioned to look like a grave. It’s a treat that’s sure to be the talk of the party. Whether you’re looking to celebrate the end of your 20s or just want a delicious dessert, this cake is a fantastic choice!
Ingredients
- 2 cups all-purpose flour
- 1 ¾ cups granulated sugar
- ¾ cup unsweetened cocoa powder
- 2 teaspoons baking powder
- 1 ½ teaspoons baking soda
- 1 teaspoon salt
- 2 large eggs
- 1 cup whole milk
- ½ cup vegetable oil
- 2 teaspoons vanilla extract
- 1 cup boiling water
- 1 package chocolate sandwich cookies (for topping)
- 1 cup of whipped cream (for filling)
- Chocolate ganache (for drizzling)
Instructions
- Preheat your oven to 350°F (175°C) and grease two 9-inch round cake pans.
- In a large bowl, mix together flour, sugar, cocoa powder, baking powder, baking soda, and salt until well combined.
- Add eggs, milk, oil, and vanilla to the dry ingredients and mix on medium speed for about 2 minutes. Stir in boiling water until well blended.
- Pour the batter evenly into the prepared pans. Bake for 30-35 minutes or until a toothpick inserted comes out clean. Let cakes cool in the pans for 10 minutes before transferring to wire racks.
- Once cooled, crumble the chocolate sandwich cookies to create the “dirt” topping.
- Layer one cake on a serving plate, spread whipped cream on top, place the second cake on top, and cover with chocolate ganache.
- Sprinkle the crumbled cookies over the top and sides for a dirt effect. Garnish with fun decorations like gummy worms or tombstone candies if desired.
- Slice and serve, enjoying the delicious layers buried in chocolate goodness!