When it comes to karaoke night, the focus is on the fun and laughter, but that doesn’t mean you can skimp on the snacks! Whether you’re belting out your favorite tunes or cheering on your friends, delicious finger foods and easy-to-eat bites can keep the vibe going without skipping a beat. Get ready to dive into a variety of tasty treats that are perfect for munching between songs and will keep everyone fueled up for a night of singing and smiles.
Microphone Cake Pops
Microphone cake pops are a fun and creative treat that will be the star of your karaoke night. These delightful snacks are not only visually appealing but also packed with flavor. The combination of moist cake and creamy frosting covered in chocolate makes them irresistible. Plus, they are super easy to make, ensuring you can focus more on the singing and less on the cooking!
These cake pops are perfect for any celebration, especially when you want to add a touch of whimsy to the party. With just a few simple ingredients, you can turn ordinary cake into a playful microphone shape that will have your guests talking. Let’s dive into the recipe so you can whip up these tasty treats!
Ingredients
- 1 box of chocolate cake mix
- 3 eggs
- 1 cup water
- 1/2 cup vegetable oil
- 1 cup buttercream frosting
- 1 lb black candy melts
- 1 lb gray candy melts
- 24 lollipop sticks
- Edible silver spray (optional)
Instructions
- Bake the Cake: Prepare the chocolate cake mix as directed on the package. Once baked, allow it to cool completely.
- Make Cake Crumbs: Crumble the cooled cake into a large bowl and mix in buttercream frosting until fully combined.
- Shape the Cake Pops: Form the mixture into small balls, then slightly taper one end to resemble a microphone. Insert a lollipop stick into the wider end.
- Chill: Place the shaped cake pops in the fridge for about 30 minutes to set.
- Melt the Coating: In separate bowls, melt the black and gray candy melts according to package instructions.
- Dip the Cake Pops: Dip each cake pop into the black candy melt, allowing excess to drip off. Use the gray candy melt for the top part to create the microphone head.
- Add Details: While the coating is still wet, use the silver spray or melted gray candy to add details to your microphone.
- Let Set: Place the finished pops in a stand or a foam block to dry completely before serving.
Mini Slider Trio
Mini sliders are the perfect finger food for a karaoke night! They pack a punch of flavor while being easy to handle, making them a hit among guests. With a variety of toppings and fillings, you can customize each slider to suit different tastes, ensuring everyone finds something they love.
This trio of mini sliders is not only simple to make, but it also offers a delightful mix of textures and flavors. Picture juicy patties topped with fresh greens, savory sauces, and a soft bun – it’s a small bite that’s big on taste!
Ingredients
- 1 pound ground beef or chicken
- 1 teaspoon garlic powder
- 1 teaspoon onion powder
- Salt and pepper, to taste
- 1 tablespoon olive oil
- 12 mini slider buns
- 1 cup lettuce, shredded
- 1/2 cup cheese, shredded (optional)
- Condiments (ketchup, mustard, BBQ sauce)
- Sliced pickles (optional)
Instructions
- Prepare the Patties: In a bowl, mix the ground meat with garlic powder, onion powder, salt, and pepper. Shape into small patties, about the size of the slider buns.
- Cook the Patties: Heat olive oil in a skillet over medium heat. Add the patties and cook for about 3-4 minutes on each side, or until they are fully cooked.
- Assemble the Sliders: Place each patty on a mini bun. Top with lettuce, cheese (if using), desired condiments, and pickles.
- Serve: Arrange the sliders on a platter and enjoy them warm with your friends while singing your favorite tunes!
Loaded Nachos Bar
Loaded nachos are a fun and tasty snack that everyone loves, especially at a karaoke night! They combine crispy tortilla chips with a variety of toppings to create a flavorful experience in every bite. The best part is that they are super easy to prepare and can be customized to suit everyone’s preferences.
Imagine a platter filled with warm chips under a mountain of cheese, fresh veggies, zesty jalapeños, and a dollop of guacamole or sour cream. Each bite bursts with flavor, making them the ultimate finger food for a laid-back evening filled with singing and laughter. Get ready to impress your guests with this delicious spread!
Ingredients
- 1 large bag of tortilla chips
- 2 cups shredded cheddar cheese
- 1 cup black beans, rinsed and drained
- 1 cup diced tomatoes
- 1/2 cup sliced jalapeños
- 1/2 cup chopped green onions
- 1 cup sour cream
- 1 cup guacamole
- 1/2 cup crumbled feta cheese (optional)
- 1 teaspoon taco seasoning (optional)
Instructions
- Preheat the oven to 350°F (175°C).
- Spread the tortilla chips evenly on a large baking sheet.
- Layer the shredded cheddar cheese over the chips.
- Sprinkle black beans, diced tomatoes, and jalapeños on top of the cheese.
- If desired, sprinkle taco seasoning for added flavor.
- Bake in the preheated oven for about 10-15 minutes, or until the cheese is melted and bubbly.
- Remove from the oven and top with chopped green onions and crumbled feta cheese if using.
- Serve immediately with sour cream and guacamole on the side.
Music Note Cookies
Music note cookies are a fun and whimsical treat that are perfect for your karaoke night! These delightful cookies, shaped like musical notes, bring a playful vibe to your gathering. They are buttery, sweet, and surprisingly easy to make, allowing you to focus on hitting those high notes rather than stressing in the kitchen.
With a light vanilla flavor and a smooth icing finish, these cookies are sure to be a hit with your guests. Plus, they can be decorated in any color to match your party theme. Grab your cookie cutters and get ready for some sweet baking!
Ingredients
- 2 ½ cups all-purpose flour
- ½ teaspoon baking powder
- ½ teaspoon salt
- 1 cup unsalted butter, softened
- 1 cup granulated sugar
- 1 large egg
- 1 teaspoon vanilla extract
- 2 cups royal icing (store-bought or homemade)
- Food coloring (for decorating)
Instructions
- Prepare the Dough: In a bowl, mix together flour, baking powder, and salt. In another bowl, cream the softened butter and sugar until light and fluffy. Beat in the egg and vanilla extract, then gradually add the flour mixture until well combined.
- Chill the Dough: Wrap the dough in plastic wrap and refrigerate for at least 1 hour to make it easier to roll out.
- Roll and Cut: Preheat your oven to 350°F (175°C). On a floured surface, roll out the chilled dough to about ¼ inch thick. Use music note cookie cutters to cut out shapes and place them on a baking sheet lined with parchment paper.
- Bake the Cookies: Bake for 8-10 minutes or until the edges are lightly golden. Let them cool completely on a wire rack.
- Decorate: Once the cookies are cool, decorate with royal icing. You can use food coloring to create different shades for your musical notes. Let the icing set before serving.
Bacon-Wrapped Jalapeño Poppers
Bacon-wrapped jalapeño poppers are a crowd-pleasing snack that packs a delightful punch of flavor. Each bite delivers a spicy kick from the jalapeño, perfectly complemented by the creamy cheese filling and the savory crunch of crispy bacon. They’re simple to make, making them an ideal choice for any karaoke night or gathering with friends.
The combination of spicy, creamy, and smoky flavors creates an irresistible treat that everyone will love. Plus, they’re easy to prepare ahead of time, so you can focus on your karaoke performance instead of being stuck in the kitchen!
Ingredients
- 12 fresh jalapeño peppers
- 8 ounces cream cheese, softened
- 1 cup shredded cheddar cheese
- 1 teaspoon garlic powder
- 1/2 teaspoon onion powder
- 12 slices of bacon, cut in half
- Cooking spray
Instructions
- Preheat the oven to 400°F (200°C) and line a baking sheet with foil. Spray the foil with cooking spray.
- Slice the jalapeños in half lengthwise and remove the seeds and membranes for less heat, if desired.
- In a bowl, mix the cream cheese, shredded cheddar, garlic powder, and onion powder until well combined.
- Fill each jalapeño half with the cheese mixture, then wrap a half slice of bacon around each filled pepper, securing it with a toothpick if necessary.
- Place the wrapped jalapeños on the prepared baking sheet and bake for 20-25 minutes, or until the bacon is crispy and the cheese is bubbly.
- Let them cool slightly before serving. Enjoy with your favorite dipping sauce!
Spinach Artichoke Dip Cups
Spinach Artichoke Dip Cups are a delightful snack that blends creamy, cheesy goodness with the vibrant flavors of spinach and artichokes. These little cups are not just tasty; they’re also easy to whip up, making them perfect for a karaoke night or any gathering. The combination of warm, melty cheese with the freshness of spinach creates a satisfying bite that everyone will love.
These dip cups offer a fun and portable way to enjoy traditional spinach artichoke dip. Each cup is filled with a rich and savory mixture, then topped with a crispy chip for that perfect crunch. It’s a simple recipe that can be prepared in advance, allowing you to focus on the fun part—singing your heart out!
Ingredients
- 1 cup frozen spinach, thawed and drained
- 1 cup canned artichoke hearts, chopped
- 1 cup cream cheese, softened
- 1/2 cup sour cream
- 1 cup shredded mozzarella cheese
- 1/2 cup grated Parmesan cheese
- 2 cloves garlic, minced
- 1/2 teaspoon salt
- 1/4 teaspoon black pepper
- Mini tortilla chips for serving
Instructions
- Preheat the oven to 350°F (175°C) and prepare a muffin tin with liners.
- In a mixing bowl, combine the thawed spinach, chopped artichokes, cream cheese, sour cream, mozzarella cheese, Parmesan cheese, garlic, salt, and pepper. Mix until everything is well combined.
- Spoon the mixture into each muffin cup, filling them about 3/4 full.
- Bake for 20-25 minutes until the tops are golden and bubbly.
- Let cool slightly, then serve warm with mini tortilla chips for dipping.
Mozzarella Sticks
Mozzarella sticks are a delightful snack that everyone loves, especially during a fun karaoke night. These cheesy bites are crispy on the outside and ooey-gooey on the inside, making them a perfect finger food. Plus, they’re surprisingly easy to whip up, so you won’t spend all your time in the kitchen while your friends are singing their hearts out!
The combination of melty mozzarella and crunchy breadcrumbs is irresistible, and pairing them with a tasty marinara or ranch dip takes them to another level. Whether you’re hosting a small gathering or just enjoying a cozy night in, mozzarella sticks are sure to satisfy your snack cravings.
Ingredients
- 12 ounces mozzarella cheese sticks
- 1 cup all-purpose flour
- 2 large eggs
- 2 cups breadcrumbs (Italian-style preferred)
- 1 teaspoon garlic powder
- 1 teaspoon onion powder
- 1/2 teaspoon salt
- 1/4 teaspoon black pepper
- Oil for frying
- Marinara sauce for dipping
Instructions
- Prepare the Cheese: Cut the mozzarella cheese sticks in half if desired for shorter sticks. Place them in the freezer for about 30 minutes to firm up.
- Set Up the Breading Station: In one bowl, place the flour. In a second bowl, beat the eggs. In a third bowl, combine the breadcrumbs, garlic powder, onion powder, salt, and pepper.
- Coat the Cheese: Dip each cheese stick first in flour, then in the beaten eggs, and finally coat in the breadcrumb mixture. For extra crunch, you can double-dip them in egg and breadcrumbs.
- Fry the Sticks: In a deep pot or fryer, heat the oil to 350°F (175°C). Carefully add a few cheese sticks at a time, frying until golden brown (about 2-3 minutes). Remove and drain on paper towels.
- Serve: Arrange the mozzarella sticks on a plate with a side of marinara sauce for dipping. Enjoy your delicious, cheesy snack while the karaoke fun unfolds!
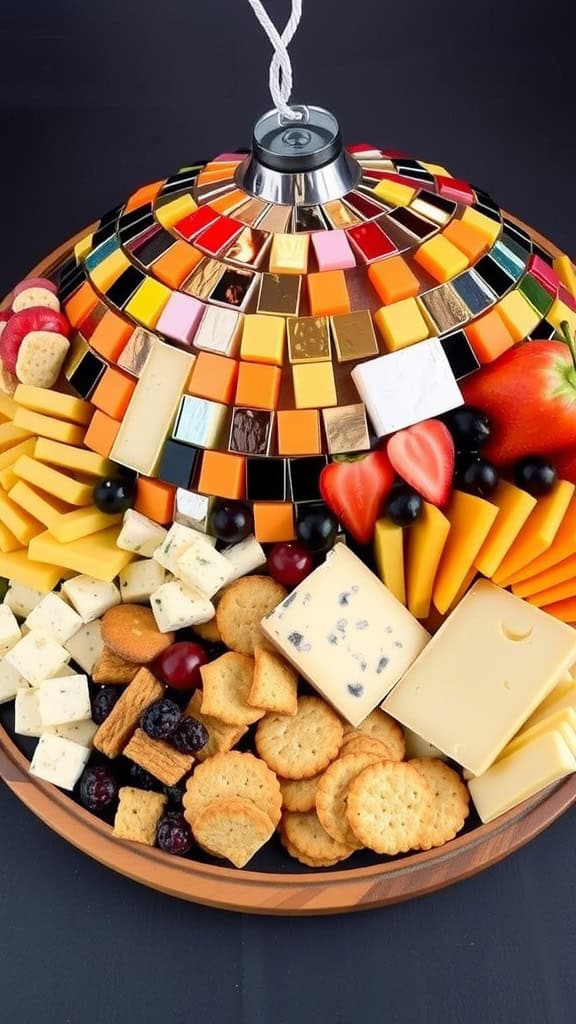
Disco Ball Cheese Board
Who doesn’t love a good cheese board? The Disco Ball Cheese Board is not only a treat for the taste buds but also a visual delight. With an array of cheeses, crackers, and fruits, it offers a delightful mix of flavors and textures. This recipe is simple enough for anyone to whip up in a jiffy, making it a perfect addition to your karaoke night.
This cheese board combines savory and sweet elements, ensuring there’s something for everyone. Whether you prefer sharp cheddar, creamy brie, or tangy blue cheese, you can mix and match to create your own unique flavor combinations. Plus, it’s a fantastic way to showcase your personality while keeping your guests satisfied!
Ingredients
- 2 cups assorted cheeses (cheddar, brie, blue cheese)
- 1 cup assorted crackers
- 1 cup mixed fruits (strawberries, grapes, apple slices)
- 1/2 cup nuts (almonds, walnuts)
- Olives or pickles for garnish
- Fresh herbs (like rosemary or thyme) for decoration
Instructions
- Gather Your Ingredients: Start by gathering all your cheeses, crackers, fruits, and nuts. Choose a variety that you enjoy and that complements each other.
- Build the Board: Arrange cheeses on a large platter or board, placing them in different sections. Add an assortment of crackers next to the cheese.
- Add Fruits and Nuts: Fill in gaps with fresh fruits and sprinkle nuts around the board for crunch. This adds color and makes the board look inviting.
- Garnish: Add a few olives or pickles for an extra zing, and place fresh herbs around the board for a touch of greenery.
- Serve: Set your cheese board out and let guests serve themselves while enjoying the karaoke tunes!
Mini Caprese Skewers
Mini Caprese Skewers are a delightful blend of flavors that come together beautifully. These bite-sized treats combine cherry tomatoes, fresh mozzarella balls, and aromatic basil leaves, all drizzled with balsamic glaze for that extra touch of flavor. They are not only delicious but also incredibly easy to prepare, making them a fantastic choice for your karaoke night.
Each skewer is a refreshing burst of taste that balances the sweetness of the tomatoes with the creaminess of the mozzarella and the fragrance of basil. These skewers are sure to be a hit with your guests, as they allow for easy snacking while belting out your favorite tunes!
Ingredients
- 1 pint cherry tomatoes
- 1 pound fresh mozzarella balls
- Fresh basil leaves
- Balsamic glaze
- Salt and pepper to taste
- Skewers
Instructions
- Assemble Skewers: On each skewer, thread a cherry tomato, followed by a basil leaf, and then a mozzarella ball. Repeat this pattern until the skewer is filled.
- Season: Once all skewers are assembled, drizzle the balsamic glaze over the top and sprinkle with salt and pepper.
- Serve: Place the skewers on a platter and enjoy them fresh, or refrigerate them until you’re ready to serve. They make for a perfect snack between karaoke performances!
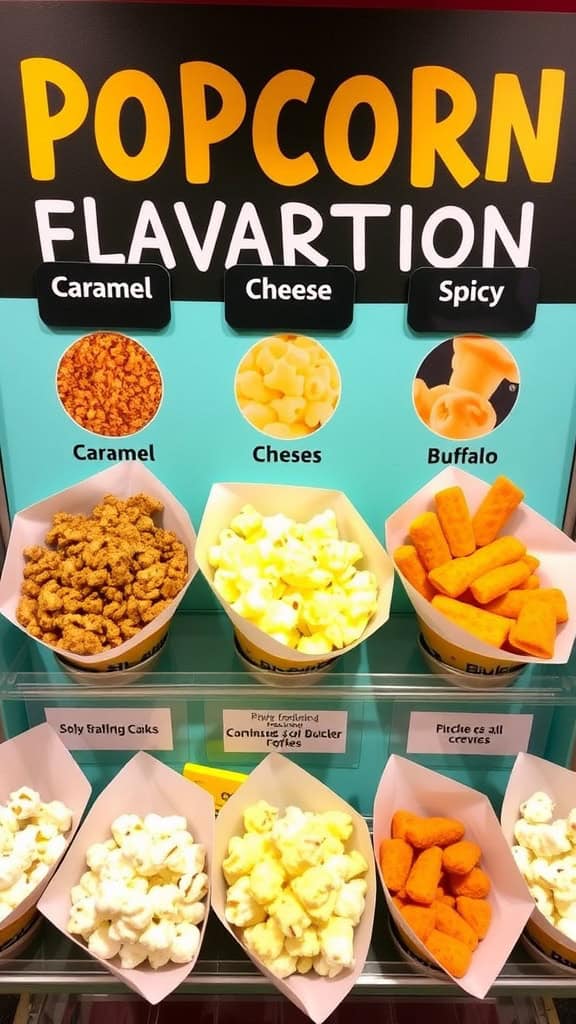
Popcorn Flavor Station
A Popcorn Flavor Station is a fun and creative way to elevate your karaoke night snacks. Imagine a spread of fluffy popcorn ready to be dressed up with a variety of flavors that cater to everyone’s taste buds. Whether you like sweet, savory, or cheesy, this station makes it super easy to customize your popcorn to match your mood as you belt out your favorite tunes.
This setup is simple to create and promises to be a hit with your guests. All you need is some freshly popped popcorn and an assortment of seasonings or toppings. It’s a light snack that pairs perfectly with the lively atmosphere of karaoke, allowing everyone to munch and mingle while they sing their hearts out.
Ingredients
- 8 cups popped popcorn
- 1/4 cup melted butter
- 1/4 cup grated Parmesan cheese
- 1/4 cup caramel sauce
- 1 tablespoon garlic powder
- 1 tablespoon paprika
- 1 tablespoon chocolate drizzle
- Salt to taste
Instructions
- Prepare the Popcorn: Pop your popcorn using an air popper or stovetop method. Make sure it’s light and fluffy. Transfer it to a large serving bowl.
- Add Flavor: Divide the popcorn into smaller bowls if you want to offer different flavors. Drizzle melted butter over the popcorn and toss to coat evenly.
- Sprinkle Seasonings: For savory popcorn, add Parmesan cheese, garlic powder, and paprika. For sweet options, drizzle caramel sauce and chocolate drizzle. Toss gently to ensure the popcorn is well-coated.
- Serve: Place the popcorn in individual cups or bowls for easy serving. Encourage your guests to mix and match flavors for a personalized popcorn experience.
Stuffed Mushroom Caps
Stuffed mushroom caps are a delightful addition to any karaoke night. These savory bites are not only tasty but also easy to prepare, making them a hit among guests. The mushrooms, filled with a creamy mixture combined with herbs and spices, create a burst of flavor with each bite. They’re perfect for snacking between songs and can be made in advance, allowing you to relax and enjoy the fun.
These stuffed mushrooms are versatile, too! You can customize the filling based on your preferences, adding ingredients like cheese, breadcrumbs, or even meats. Everyone will appreciate these little treats, and they’ll surely be a crowd-pleaser. Plus, they look elegant enough to impress your friends while being simple enough to whip up in no time.
Ingredients
- 16 large mushroom caps
- 1 cup cream cheese, softened
- 1/2 cup grated Parmesan cheese
- 1/2 cup cooked sausage, crumbled
- 2 tablespoons fresh parsley, chopped
- 1 teaspoon garlic powder
- 1 teaspoon onion powder
- Salt and pepper to taste
- 1/2 cup shredded mozzarella cheese
Instructions
- Preheat the oven to 375°F (190°C).
- Remove the stems from the mushroom caps and finely chop them. In a bowl, combine the chopped stems, cream cheese, Parmesan cheese, cooked sausage, parsley, garlic powder, onion powder, salt, and pepper. Mix until well blended.
- Stuff each mushroom cap generously with the filling, pressing down slightly to secure it.
- Place the stuffed mushrooms on a baking sheet and top each one with shredded mozzarella cheese.
- Bake for 20-25 minutes, or until the mushrooms are tender and the cheese is bubbly and golden brown.
- Allow to cool slightly before serving. Enjoy your delicious stuffed mushroom caps while singing your favorite tunes!
Chicken Wing Platter
Chicken wings are a go-to for any karaoke night, providing that perfect blend of crispy, saucy, and savory flavors that everyone loves. These wings are not just delicious; they are also easy to prepare, making them an ideal choice for busy hosts. Coated in a zesty sauce, they deliver a satisfying kick that pairs perfectly with a variety of dipping sauces.
Whether you’re belting out your favorite tunes or simply enjoying the company of friends, a platter of chicken wings will keep the energy high and the taste buds happy. Serve them with ranch, blue cheese, or a spicy hot sauce for dipping to cater to every palate.
Ingredients
- 2 pounds chicken wings
- 1/2 cup hot sauce
- 1/4 cup unsalted butter
- 1 tablespoon garlic powder
- 1 teaspoon salt
- 1 teaspoon black pepper
- 1 teaspoon paprika
- 1 teaspoon onion powder
- 1 tablespoon honey (optional)
Instructions
- Preheat the Oven: Preheat your oven to 400°F (200°C) and line a baking sheet with aluminum foil for easy cleanup.
- Prepare the Wings: Rinse and pat dry the chicken wings. In a large bowl, toss them with salt, pepper, garlic powder, paprika, and onion powder until well coated.
- Bake the Wings: Spread the wings in a single layer on the prepared baking sheet. Bake for about 40-45 minutes, flipping halfway through, until they are crispy and cooked through.
- Make the Sauce: In a small saucepan over medium heat, melt the butter and mix in the hot sauce and honey, if using. Stir until well combined.
- Coat the Wings: Once the wings are done, transfer them to a large bowl and pour the sauce over them. Toss to coat evenly.
- Serve: Arrange the wings on a platter with your favorite dipping sauces and enjoy throughout your karaoke night!
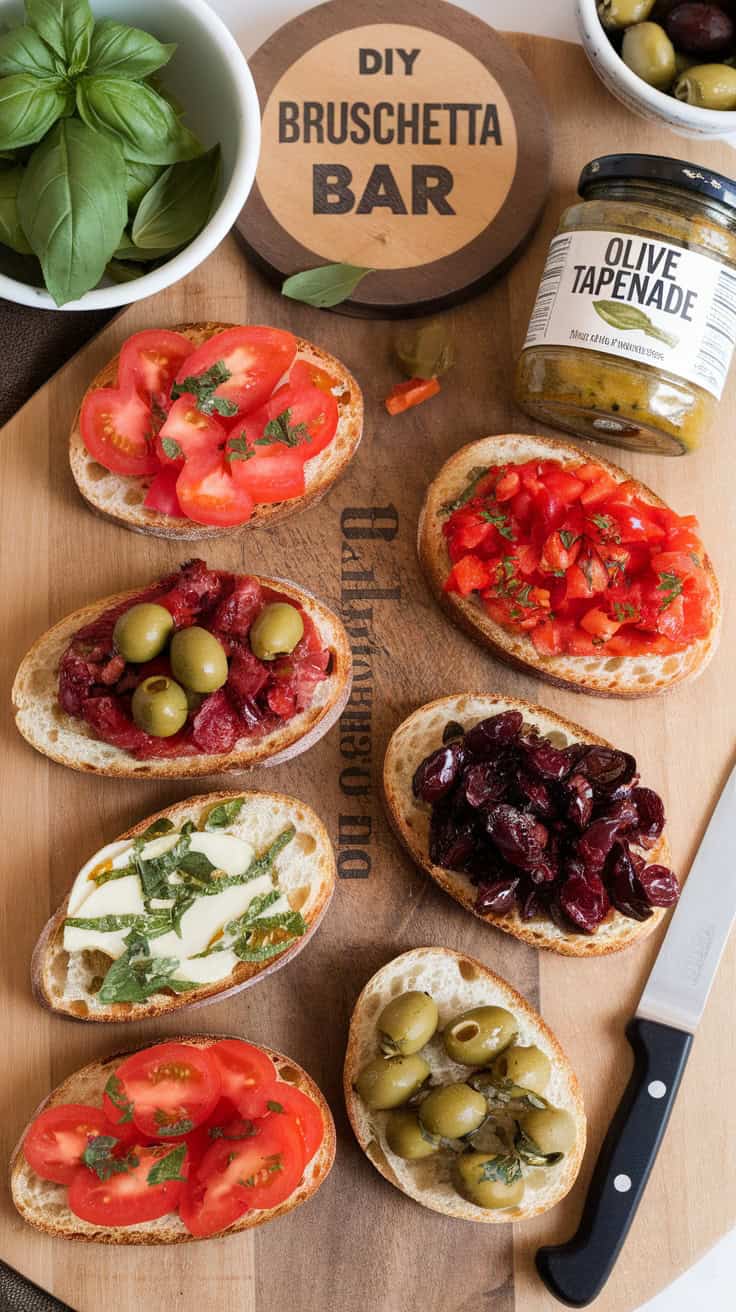
Bruschetta Bar
Setting up a bruschetta bar is a delightful way to add some flair to your karaoke night. With a variety of toppings, guests can mix and match to create their own perfect bites. The combination of fresh tomatoes, fragrant basil, and toasted bread creates a burst of flavor that’s sure to please everyone. Plus, this recipe is simple enough for everyone to join in on the fun!
Start with slices of a good quality baguette, lightly toasted for that satisfying crunch. From there, offer a range of toppings like diced tomatoes with garlic, olives, or even creamy cheese spreads. This allows each person to customize their bruschetta just the way they like it. It’s a relaxed and interactive way to enjoy appetizers while singing your heart out!
Ingredients
- 1 baguette
- 4 ripe tomatoes, diced
- 2 cloves garlic, minced
- 1/4 cup fresh basil, chopped
- 1/4 cup olive oil
- Salt and pepper to taste
- 1/2 cup olives, chopped (optional)
- 1/2 cup ricotta cheese (optional)
Instructions
- Preheat your oven to 400°F (200°C).
- Slice the baguette into 1/2 inch slices and place them on a baking sheet. Brush each slice with olive oil.
- Bake for about 5-7 minutes, until golden and crispy.
- In a bowl, combine the diced tomatoes, minced garlic, chopped basil, olive oil, salt, and pepper. Mix well.
- Once the bread is ready, top each slice with the tomato mixture. You can also add olives or a dollop of ricotta cheese for extra flavor.
- Serve immediately and let your guests enjoy creating their own bruschetta combinations!
Mini Quesadilla Triangles
Mini quesadilla triangles are a delightful snack perfect for sharing during your karaoke night. These bite-sized wonders are filled with gooey cheese and your favorite ingredients, making them a tasty addition to any gathering. The crispy exterior paired with the melty filling creates a satisfying crunch with every bite, ensuring everyone keeps coming back for more.
Making these mini quesadillas is a breeze. You can easily customize the filling to suit your taste, whether you prefer classic cheese, beans, or even some grilled veggies. They’re quick to whip up and can be served with a variety of dips like salsa, guacamole, or sour cream for extra flavor.
Ingredients
- 4 medium flour tortillas
- 1 cup shredded cheese (cheddar, Monterey Jack, or your choice)
- 1/2 cup black beans, rinsed and drained
- 1/2 cup cooked chicken or veggies (optional)
- 1 tablespoon olive oil
- Salt and pepper, to taste
- Salsa, guacamole, or sour cream for serving
Instructions
- Heat a skillet over medium heat and add a little olive oil.
- Place one tortilla in the skillet and sprinkle half of the cheese on one side.
- Add black beans and any optional ingredients like chicken or veggies, then top with the remaining cheese.
- Fold the tortilla in half and cook for 2-3 minutes, until golden brown. Flip and cook the other side for another 2-3 minutes.
- Remove from the skillet and let cool slightly before cutting into triangles.
- Serve warm with your favorite dips on the side.
Veggie Spring Rolls
Veggie spring rolls are a light and refreshing snack that’s perfect for a karaoke night. These delightful bites are filled with crisp vegetables, making them both crunchy and satisfying. They’re also super simple to prepare, so you can whip them up in no time, leaving you plenty of moments to enjoy the singing and laughter.
Pair these rolls with a zesty dipping sauce, and you’ve got a hit on your hands. The fresh flavors of the veggies combined with the dipping sauce create a tasty experience that everyone will love. Plus, they’re a great way to sneak in some healthy ingredients without sacrificing fun!
Ingredients
- 8 rice paper wrappers
- 1 cup carrots, julienned
- 1 cup cucumber, julienned
- 1 cup bell peppers, sliced
- 1 cup lettuce, shredded
- 1/2 cup cilantro leaves
- 1/4 cup mint leaves
- Dipping sauce (store-bought or homemade)
Instructions
- Prepare the Ingredients: Start by washing and slicing all the vegetables into thin strips. Set them aside.
- Soften the Rice Paper: Fill a shallow dish with warm water. Dip one rice paper wrapper into the water for about 10-15 seconds until it becomes soft and pliable.
- Fill the Wrapper: Lay the softened wrapper on a clean surface. Place a small handful of the prepared veggies and herbs in the center.
- Roll It Up: Fold the sides of the wrapper over the filling, then roll it up tightly from the bottom to the top. Repeat with the remaining wrappers and filling.
- Serve: Arrange the spring rolls on a platter and serve with your favorite dipping sauce.
Pretzel Bites With Cheese Dip
Pretzel bites with cheese dip are the perfect finger food for a karaoke night. They offer a delightful combination of chewy pretzel texture and warm, creamy cheese that everyone loves. Easy to make, these bites are a crowd-pleaser that encourages mingling and sharing, allowing everyone to enjoy their snacks while belting out tunes.
The slightly salty pretzels complement the rich cheese dip beautifully, creating a flavor profile that’s both comforting and satisfying. This recipe is simple enough for even novice cooks, making it a great addition to your karaoke party menu.
Ingredients
- 1 cup warm water
- 2 tablespoons granulated sugar
- 1 packet active dry yeast (2 1/4 teaspoons)
- 2 cups all-purpose flour
- 1 teaspoon salt
- 1/4 cup baking soda
- 1 large egg, beaten
- Coarse salt, for sprinkling
- 1 cup cheddar cheese, shredded
- 1/2 cup cream cheese
- 1 tablespoon milk
- 1 teaspoon garlic powder
Instructions
- Mix the Dough: In a bowl, combine warm water, sugar, and yeast. Let it sit for about 5 minutes until it becomes frothy. Stir in flour and salt until a dough forms.
- Knead the Dough: Turn the dough onto a floured surface and knead for about 5-7 minutes until it’s smooth. Place it in a greased bowl, cover, and let it rise for about 1 hour.
- Shape the Bites: Preheat the oven to 425°F (220°C). Roll the dough into small balls and then into pretzel shapes. Dip each pretzel into a baking soda solution (1/4 cup baking soda mixed with 2 cups water) for about 30 seconds.
- Bake the Pretzels: Place the pretzels on a baking sheet lined with parchment paper. Brush with the beaten egg and sprinkle with coarse salt. Bake for 12-15 minutes until golden brown.
- Prepare the Cheese Dip: In a saucepan over medium heat, combine cheddar cheese, cream cheese, milk, and garlic powder. Stir until melted and smooth.
- Serve: Enjoy the warm pretzel bites with the cheesy dip while you sing your heart out!
Deviled Eggs
Deviled eggs are a classic finger food that combines the creamy goodness of egg yolks with zesty flavors, making them an inviting choice for any gathering. They are simple to prepare, requiring minimal ingredients and equipment, which means you can whip them up in no time as your guests arrive for karaoke night.
The smooth, rich filling is perfectly complemented by a sprinkle of paprika and fresh herbs, creating a delightful bite that’s both satisfying and easy to eat. Plus, they can be made ahead of time, allowing you to focus on the performances instead of the kitchen!
Ingredients
- 6 large eggs
- 1/4 cup mayonnaise
- 1 teaspoon Dijon mustard
- 1 teaspoon white vinegar
- Salt and pepper to taste
- Paprika for garnish
- Chopped chives or parsley for garnish
Instructions
- Boil the Eggs: Place the eggs in a pot and cover them with cold water. Bring to a boil over medium-high heat. Once boiling, cover the pot and remove from heat. Let the eggs sit for about 12 minutes.
- Cool the Eggs: Transfer the eggs to an ice bath for a few minutes to cool them down quickly. This makes peeling easier.
- Prepare the Filling: Peel the eggs and slice them in half lengthwise. Remove the yolks and place them in a bowl. Mash the yolks with mayonnaise, Dijon mustard, white vinegar, salt, and pepper until smooth.
- Fill the Eggs: Spoon or pipe the yolk mixture back into the egg whites. Sprinkle with paprika and garnish with chopped chives or parsley.
- Serve: Arrange the deviled eggs on a platter and enjoy them with your favorite karaoke tunes!
Antipasto Skewers
Antipasto skewers are a delightful blend of flavors and textures, making them a fun addition to any karaoke night. They combine savory meats, creamy cheese, and fresh veggies, creating a tasty bite-sized treat that everyone will enjoy. Plus, they are super easy to assemble—perfect for a quick and satisfying snack!
Whether you’re a fan of spicy salami or mild mozzarella, these skewers can be customized to your liking. Just thread your favorite ingredients onto a skewer and serve them with a dipping sauce for an extra layer of flavor. They not only look great on the table but also offer a wonderful variety of tastes!
Ingredients
- 1 cup cherry tomatoes
- 1 cup assorted olives (black and green)
- 8 ounces salami or pepperoni, sliced
- 8 ounces mozzarella cheese, cubed
- 1 cup bell peppers, diced (any color)
- Fresh basil or parsley for garnish
- Wooden skewers
Instructions
- Prepare Skewers: Take a wooden skewer and start threading your ingredients. Alternate between cherry tomatoes, olives, salami, mozzarella, and bell peppers for a colorful presentation.
- Repeat: Continue to add ingredients until the skewer is filled, leaving a little space at the end for easy handling.
- Garnish: Once all skewers are assembled, garnish with fresh basil or parsley for a pop of color.
- Serve: Arrange the skewers on a platter and serve with your favorite dipping sauce, like balsamic glaze or Italian dressing.
Mini Taco Cups
Mini Taco Cups are a fun and flavorful twist on traditional tacos, perfect for a karaoke night with friends. These bite-sized treats pack a punch with their seasoned filling and are easy to eat while belting out your favorite tunes. Plus, they offer a great balance of savory and fresh flavors that everyone will love.
Making these mini taco cups is simple and requires minimal prep time, which means you can focus on the music instead of the cooking. They’re customizable too, so you can add your favorite toppings or ingredients for a personal touch. Get ready to impress your guests with this tasty snack!
Ingredients
- 1 package of mini tortilla cups
- 1 pound ground beef (or turkey)
- 1 packet taco seasoning
- 1 cup black beans, rinsed and drained
- 1 cup corn, frozen or canned
- 1/2 cup diced bell peppers
- 1 cup shredded cheese (cheddar or Mexican blend)
- 1/2 cup salsa
- 1/4 cup sour cream (for serving)
- Fresh cilantro (for garnish)
Instructions
- Preheat your oven to 350°F (175°C) and arrange the mini tortilla cups on a baking sheet.
- In a skillet over medium heat, brown the ground beef until fully cooked. Drain excess fat, then stir in the taco seasoning and cook according to package instructions.
- Add black beans, corn, and diced bell peppers to the skillet, mixing well to combine. Let it heat through for about 3-4 minutes.
- Spoon the taco filling into each mini tortilla cup, filling them generously.
- Top each cup with shredded cheese and bake for about 10-15 minutes, or until the cheese is melted and bubbly.
- Remove from the oven and serve warm, garnished with salsa, sour cream, and fresh cilantro.
Garlic Parmesan Knots
If you’re looking for a mouthwatering snack that pairs perfectly with a karaoke night, garlic parmesan knots are a delightful choice. These soft, buttery bites are infused with garlic and covered in a sprinkle of parmesan, making each knot a flavorful treat. Plus, they’re easy to whip up, so you can spend less time in the kitchen and more time belting out your favorite songs!
The combination of warm bread and aromatic garlic creates a comforting snack that everyone will enjoy. Whether you’re dipping them into marinara sauce or enjoying them on their own, these knots are sure to be a hit at your gathering. Get ready to impress your friends with this tasty addition to your karaoke lineup!
Ingredients
- 1 package (1/4 oz) active dry yeast
- 1 cup warm water (110°F/45°C)
- 2 tablespoons granulated sugar
- 2 cups all-purpose flour
- 1 teaspoon salt
- 3 tablespoons unsalted butter, melted
- 2 tablespoons garlic, minced
- 1/4 cup grated parmesan cheese
- 2 tablespoons fresh parsley, chopped (optional)
Instructions
- Activate Yeast: In a bowl, combine warm water, sugar, and yeast. Let it sit for about 5 minutes until foamy.
- Make Dough: In another bowl, mix flour and salt. Gradually add the yeast mixture and melted butter, stirring until a dough forms.
- Knead Dough: Turn the dough onto a floured surface and knead for about 5-7 minutes until smooth. Place in a greased bowl, cover, and let rise for about 1 hour until doubled in size.
- Shape Knots: Preheat your oven to 375°F (190°C). Divide the dough into small pieces, roll each into a rope, and tie into knots.
- Prepare Topping: In a small bowl, mix melted butter with minced garlic. Brush over the knots and sprinkle with parmesan cheese.
- Bake: Place knots on a baking sheet and bake for 15-20 minutes until golden brown. Optionally, sprinkle with fresh parsley before serving.
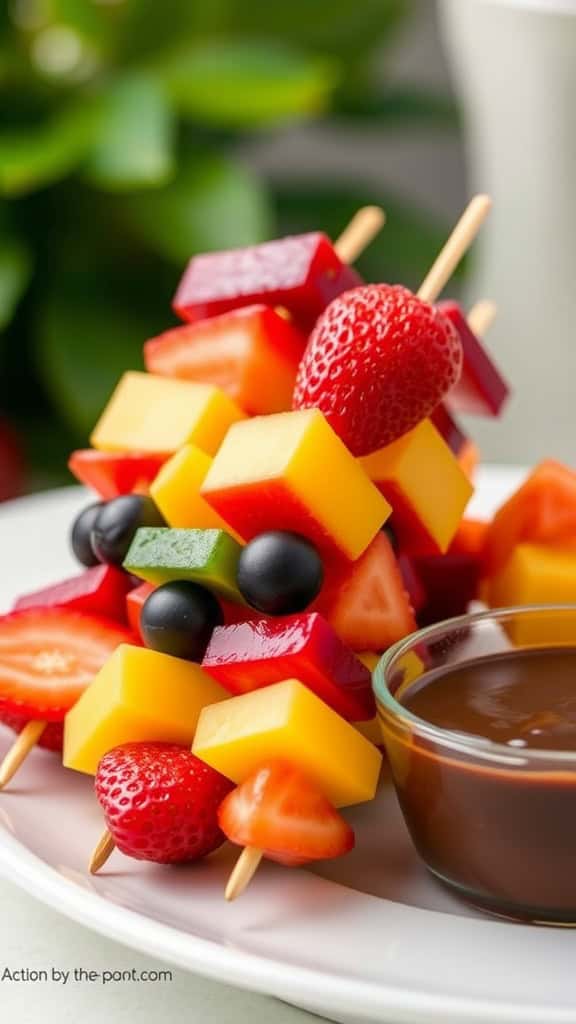
Fruit Kabobs With Chocolate Dip
Fruit kabobs are a fun and colorful addition to any karaoke night. Easy to make and delightful to eat, these skewers are packed with various fresh fruits that provide a sweet and refreshing taste. Paired with a rich chocolate dip, they create the perfect balance of flavors that everyone will love.
Making these fruit kabobs is simple and requires minimal preparation. Just chop your favorite fruits, thread them onto skewers, and serve with a side of chocolate dip. It’s a quick treat that brings a burst of color and sweetness to your snack table!
Ingredients
- 1 cup strawberries, hulled
- 1 cup pineapple, diced
- 1 cup mango, diced
- 1 cup green grapes
- 1 cup blueberries
- 1 cup colorful gummy candies (optional)
- 1 cup chocolate chips
- 1 tablespoon coconut oil
Instructions
- Prepare the Fruit: Wash and cut the strawberries, pineapple, and mango into bite-sized pieces.
- Assemble the Kabobs: On skewers, alternate threading the fruits and gummy candies if using. Be creative with the colors!
- Make the Chocolate Dip: In a microwave-safe bowl, combine the chocolate chips and coconut oil. Microwave in 30-second intervals, stirring until smooth.
- Serve: Arrange the fruit kabobs on a platter and provide a bowl of chocolate dip for dipping. Enjoy!
Cocktail Meatballs
Cocktail meatballs are a delightful addition to any karaoke night, combining savory flavor with a touch of sweetness. These bite-sized treats are easy to make and sure to be a hit among guests. With their tender texture and flavorful sauce, they offer a satisfying snack that pairs perfectly with lively singing and good company.
The beauty of cocktail meatballs lies in their versatility. You can customize the ingredients to suit your taste, whether you prefer a tangy barbecue sauce or a sweet and sour glaze. They’re simple to prepare, allowing you to focus on the fun of the night rather than slaving away in the kitchen.
Ingredients
- 1 pound ground beef
- 1/2 cup breadcrumbs
- 1/4 cup grated Parmesan cheese
- 1/4 cup chopped parsley
- 1 large egg
- 1 teaspoon garlic powder
- 1 teaspoon onion powder
- 1/2 teaspoon salt
- 1/4 teaspoon black pepper
- 1 cup barbecue sauce
- 1/2 cup grape jelly
Instructions
- Preheat your oven to 375°F (190°C). In a large bowl, mix together the ground beef, breadcrumbs, Parmesan cheese, parsley, egg, garlic powder, onion powder, salt, and pepper until well combined.
- Form the mixture into small meatballs, about 1 inch in diameter, and place them on a baking sheet lined with parchment paper.
- Bake the meatballs for 20-25 minutes or until they are cooked through and browned on the outside.
- In a saucepan, combine the barbecue sauce and grape jelly over medium heat. Stir until the mixture is smooth and heated through.
- Once the meatballs are done baking, transfer them to the sauce and toss to coat. Serve warm with toothpicks for easy snacking.
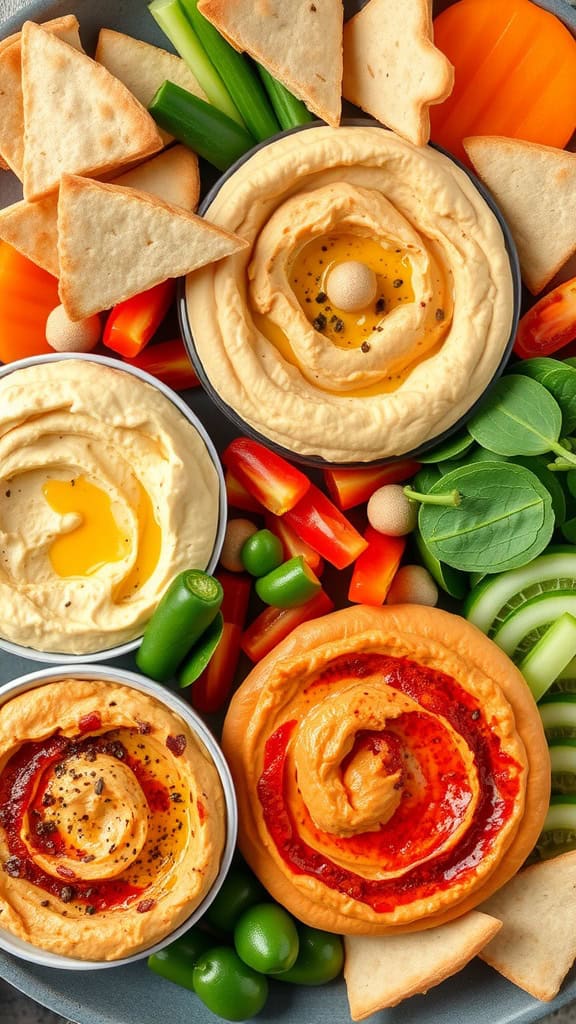
Hummus And Pita Platter
Hummus and pita is a delightful choice for a karaoke night, bringing bold flavors and a satisfying texture to the table. This dish offers a creamy, savory taste from the hummus, perfectly complemented by the warm, soft pita bread. Plus, it’s incredibly easy to prepare, making it a hit for any gathering.
This platter can be customized with different hummus flavors and a variety of fresh veggies for dipping, making it both a healthy and tasty option. It’s a fun and interactive snack that your guests can enjoy while belting out their favorite tunes!
Ingredients
- 1 can chickpeas, drained and rinsed
- 1/4 cup tahini
- 2 tablespoons olive oil
- 1 garlic clove, minced
- 1 tablespoon lemon juice
- 1/2 teaspoon cumin
- Salt to taste
- Pita bread, cut into triangles
- Fresh veggies (carrots, cucumbers, bell peppers, celery)
- Optional toppings: paprika, olive oil, chopped parsley
Instructions
- Make the Hummus: In a blender or food processor, combine chickpeas, tahini, olive oil, garlic, lemon juice, cumin, and salt. Blend until smooth, adding a little water if necessary to reach your desired consistency.
- Prepare the Pita: While the hummus is blending, cut the pita bread into triangles. You can serve it as is or warm the pita in the oven for a few minutes for added softness.
- Arrange the Platter: Place the hummus in a bowl at the center of a serving platter. Surround it with pita triangles and an assortment of fresh veggies for dipping.
- Add Garnishes: Drizzle the hummus with olive oil, sprinkle with paprika, and garnish with chopped parsley if desired.
- Serve and Enjoy: Set the platter on the table and let your guests dig in while enjoying the karaoke!
Sushi Roll Platter
Sushi rolls are a fun and delicious finger food that can elevate your karaoke night. They are colorful, flavorful, and can be customized to suit everyone’s taste. Whether you prefer classic combinations like cucumber and avocado or want to explore with fresh seafood, these rolls are simple to make and sure to impress your guests.
Making sushi rolls at home is easier than you might think. With just a few ingredients and some basic techniques, you can create a beautiful platter that not only tastes good but also looks appealing on your table. Grab your sushi mat, and let’s get rolling!
Ingredients
- 2 cups sushi rice
- 2 1/2 cups water
- 1/4 cup rice vinegar
- 2 tablespoons sugar
- 1 teaspoon salt
- Nori sheets (seaweed)
- 1 cucumber, julienned
- 1 carrot, julienned
- 1 avocado, sliced
- 4 ounces smoked salmon or cooked shrimp
- Soy sauce, for serving
- Wasabi and pickled ginger, for garnish
Instructions
- Prepare the Rice: Rinse the sushi rice under cold water until the water runs clear. Combine rice and water in a rice cooker or pot, and cook according to the rice cooker’s instructions or bring to a boil, then simmer for 20 minutes. Remove from heat and let it sit for 10 minutes.
- Season the Rice: In a small bowl, mix rice vinegar, sugar, and salt until dissolved. Fold this mixture into the cooked rice while it’s still warm. Let it cool to room temperature.
- Assemble the Rolls: Place a nori sheet shiny side down on a bamboo sushi mat. Wet your hands to prevent sticking, and spread a thin layer of sushi rice over the nori, leaving a 1-inch border at the top. Lay your choice of fillings (cucumber, carrot, avocado, and salmon or shrimp) in a line across the rice.
- Roll It Up: Using the mat, carefully roll the sushi away from you, pressing gently but firmly to keep the roll tight. Seal the edge with a bit of water. Repeat with remaining ingredients.
- Slice and Serve: Using a sharp knife, slice the rolls into bite-sized pieces. Arrange them on a platter and serve with soy sauce, wasabi, and pickled ginger.
Mini Dessert Shooters
Mini dessert shooters are a delightful way to satisfy your sweet tooth without overwhelming your guests. These tiny layered treats are not only visually appealing but also offer a delightful mix of flavors and textures. The combination of creamy layers, fresh fruits, and crunchy elements makes each bite a little celebration!
They’re simple to prepare, and you can customize them based on your favorite flavors or seasonal fruits. Perfect for a karaoke night, these mini desserts allow guests to indulge while singing their hearts out!
Ingredients
- 1 cup vanilla pudding
- 1 cup whipped cream
- 1 cup crushed graham crackers
- 1 cup mixed berries (strawberries, raspberries, blueberries)
- 2 tablespoons powdered sugar
- 1 teaspoon vanilla extract
Instructions
- Prepare the Pudding: In a bowl, mix vanilla pudding with powdered sugar and vanilla extract until smooth.
- Layer the Ingredients: In small cups or shot glasses, start with a layer of crushed graham crackers, followed by a layer of vanilla pudding, then add a layer of mixed berries. Repeat the layers until the cups are filled.
- Add Whipped Cream: Top each shooter with a dollop of whipped cream and a few extra berries for garnish.
- Chill and Serve: Refrigerate the dessert shooters for at least an hour before serving to let the flavors meld together.


